
I will present the first steps of the point cloud vectorization with the free and open-source CloudCompare. For polyline-based vectorization, the point cloud needs to be imported into CloudCompare.
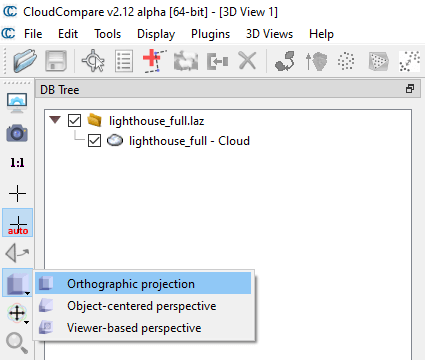
After opening the point cloud, but before drawing the polyline (vectorization), you must set a camera view that you can easily work with. Orthographic projection is recommended, as the projection rays are parallel to each other and perpendicular to the image plane. In colloquial terms, this means that the bounding surfaces of an object are formed without distortion.
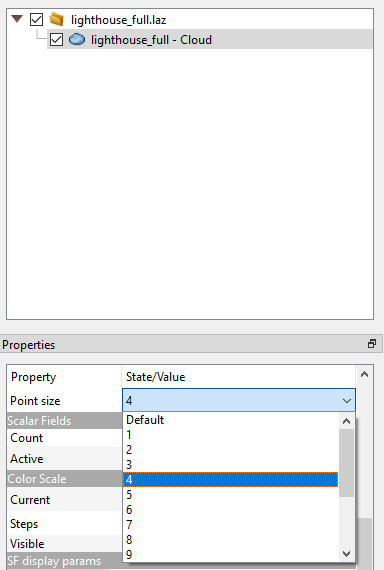
If the point cloud is not dense enough, you should increase the size of the points for better visibility. You can do this by selecting your point cloud on the DB Tree, then selecting a larger value in the Point size drop-down menu under Properties.
Before vectorizing the polyline, you should use the Numpad keys to rotate the camera to view the point cloud from a good angle. By pressing “8” you can see the point cloud from a top view, while by pressing “4” and “6” you can see the point cloud from different side views. This is of course a starting point! You can freely change this while vectorizing the polyline. In the 3D model space, you can zoom in or out by scrolling up and down with the mouse wheel, you can drag the 3D space by holding down the right mouse button, and you can rotate it by holding down the left mouse button.
Vectorizing a point cloud with polylines
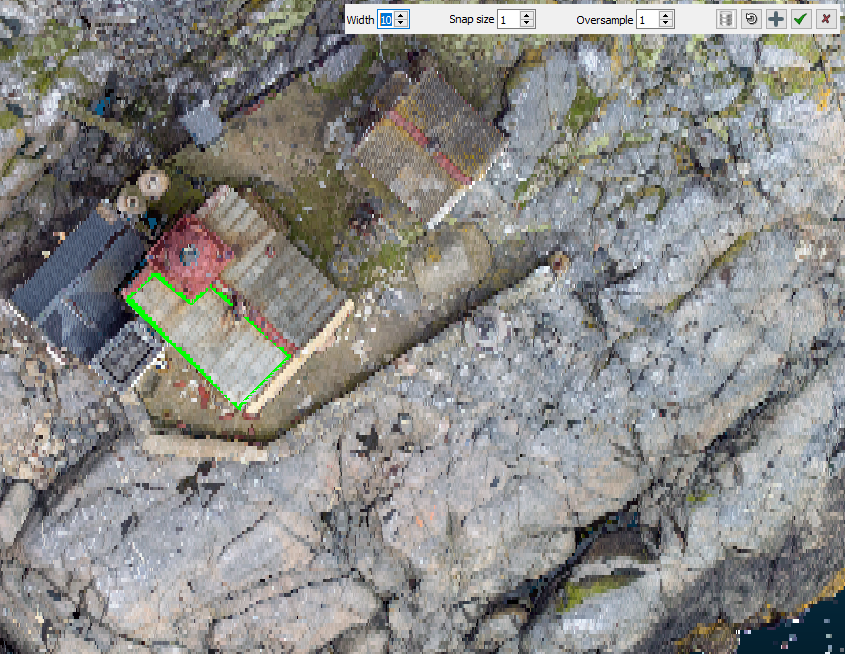
To vectorize the point cloud, find the Trace Polyline by Point picking (![]() ) function from the top menu bar. After you clicked on it, a new menu appeared in the upper right corner of the 3D model space.
) function from the top menu bar. After you clicked on it, a new menu appeared in the upper right corner of the 3D model space.

By clicking on the point cloud with the left mouse button, the vertices of the polyline can be placed. If the polyline is not visible during vectorization, you can increase the line thickness by increasing the Width value.
Snapping a polyline to the point cloud
You can also add the polyline to the point cloud using different methods. You can increase the Snap size in the Trace Polyline by Point picking menu. With this solution, the snapping of a vertex to be placed to the point cloud can be subject to a larger error, since the software searches between the points of the point cloud in a larger radius.
An important note! Unfortunately, in the current (2.12) version of CloudCompare, there is no possibility to manually move a wrongly placed vertex to another place. That’s why you should pay particular attention to where you place vertices.
The other snapping option is that a new vertex is created every equal distance in the sections between the vertices of the vectorized polyline, which the software matches to the nearest point of the point cloud. You can achieve increased the density of the new and better alignment with the point cloud (resampling) by increasing the value of Oversample. Oversample will only take effect when the polyline vectorization is complete.
Closing the vectorized polyline
You can close the vectorization of the polyline on the point cloud by pressing the right mouse button. CloudCompare did not save the polyline at this time, only closed the editing. You can restart the editing of the current polyline by clicking the Continue the current polyline edition (![]() ) button in the Trace Polyline by Point picking menu. If you would like to discard all your edits without closing the vectorization function, click the Reset current polyline (
) button in the Trace Polyline by Point picking menu. If you would like to discard all your edits without closing the vectorization function, click the Reset current polyline (![]() ) button.
) button.
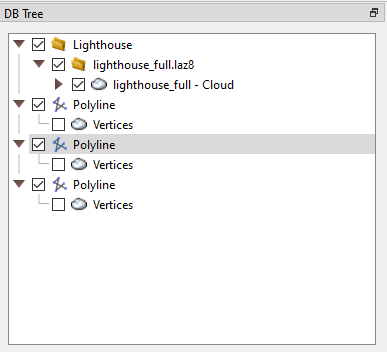
There are two options for actually saving the polyline. One is to save the vectorized polyline and add it to the CloudCompare DB Tree. You can do this with the Export current polyline to the main DB (![]() ) button in the Trace Polyline by Point picking menu. Then you can continue the vectorization by drawing another polyline. The other option is to save the polyline with the green tick in the Trace Polyline by Point picking menu and close the vectorizer or discard your edits with the red X and close it (
) button in the Trace Polyline by Point picking menu. Then you can continue the vectorization by drawing another polyline. The other option is to save the polyline with the green tick in the Trace Polyline by Point picking menu and close the vectorizer or discard your edits with the red X and close it (![]() ).
).
Styling the vectorized polyline
The saved polylines are displayed in the CloudCompare DB Tree. Here you have to select the one whose color you want to set.
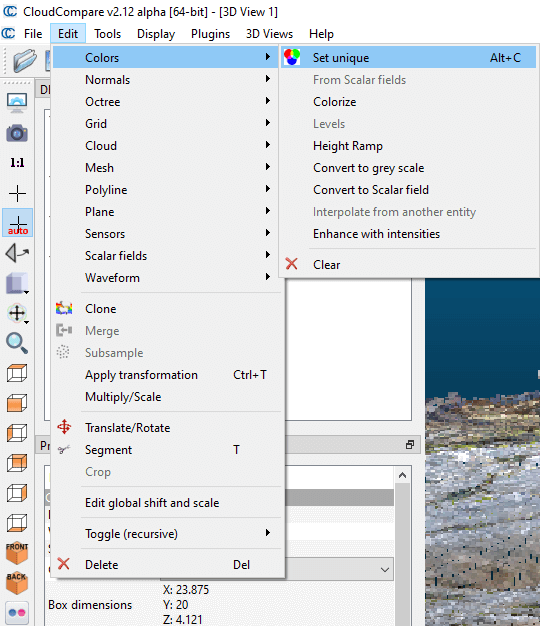
You can set the color of the selected polyline under the Edit/Colors/Set unique menu.
Exporting the vectorized polyline
In the DB Tree, select the polylines to be exported (you can even select more than one), then select the blue floppy shaped Save button. Here you must specify the geospatial data exchange format you want to save it in (dxf, shapefile).

Sharing of the vectorized polylines
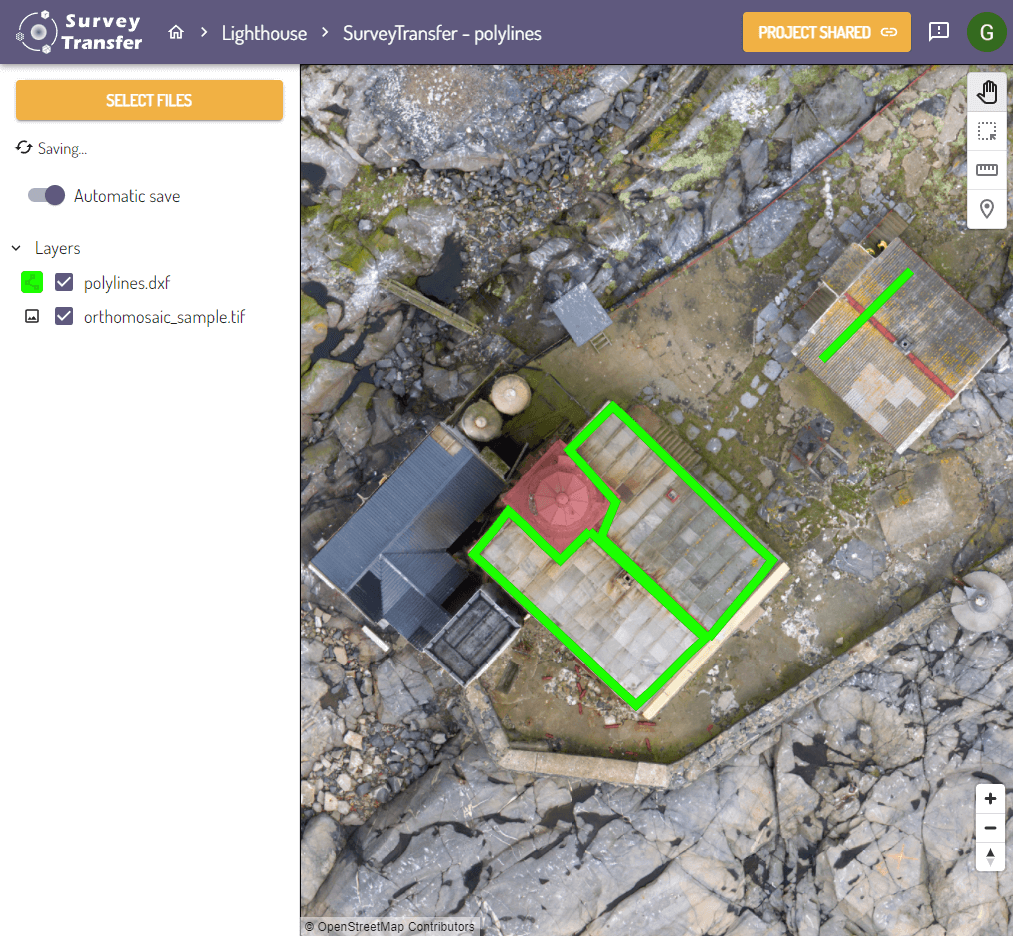
You can simply upload the vectorized polylines (shapefile and dxf) to SurveyTransfer. Here you can create a map, so you can share your results via the web with a link.
Sidenote: CloudCompare generates polylines without a Coordinate Reference System (CRS). SurveyTransfer can only handle such files if you have previously set the CRS of the given project.
If you really liked what you read, you can share it with your friends. 🙂
Did you like what you read? Do you want to read similar ones?