
A point cloud created after photogrammetric or LiDAR processing needs to be cleaned, this is also possible in CloudCompare: clipping unnecessarily formed boundaries, filtering and removing points generated in the wrong place, etc. During cleaning, there may be a need to mask the point cloud, i.e. to cut out outlier geometries within the examined area. After the masking, there is a lack of data, which can be compensated based on some criteria. CloudCompare is a particularly good tool for masking point clouds. CloudCompare is a free, open-source software that provides a great set of tools for analyzing point clouds. You can access the software by clicking HERE.
The output files of the CloudCompare process can be large point clouds, orthomosaics, digital elevation models (DEM) and 3D models. These can be difficult to share with the client and colleagues. It is strongly recommended to use the SurveyTransfer data sharing software! For more information, visit the website of the software manufacturer by clicking HERE.
When might it be necessary to mask a point cloud and generate a new surface? I give two specific examples… Let’s take the simpler case first. A point cloud contains buildings, plants, trees, machines, and other objects that you would like to delete from your scan, and then replace them with a plane.
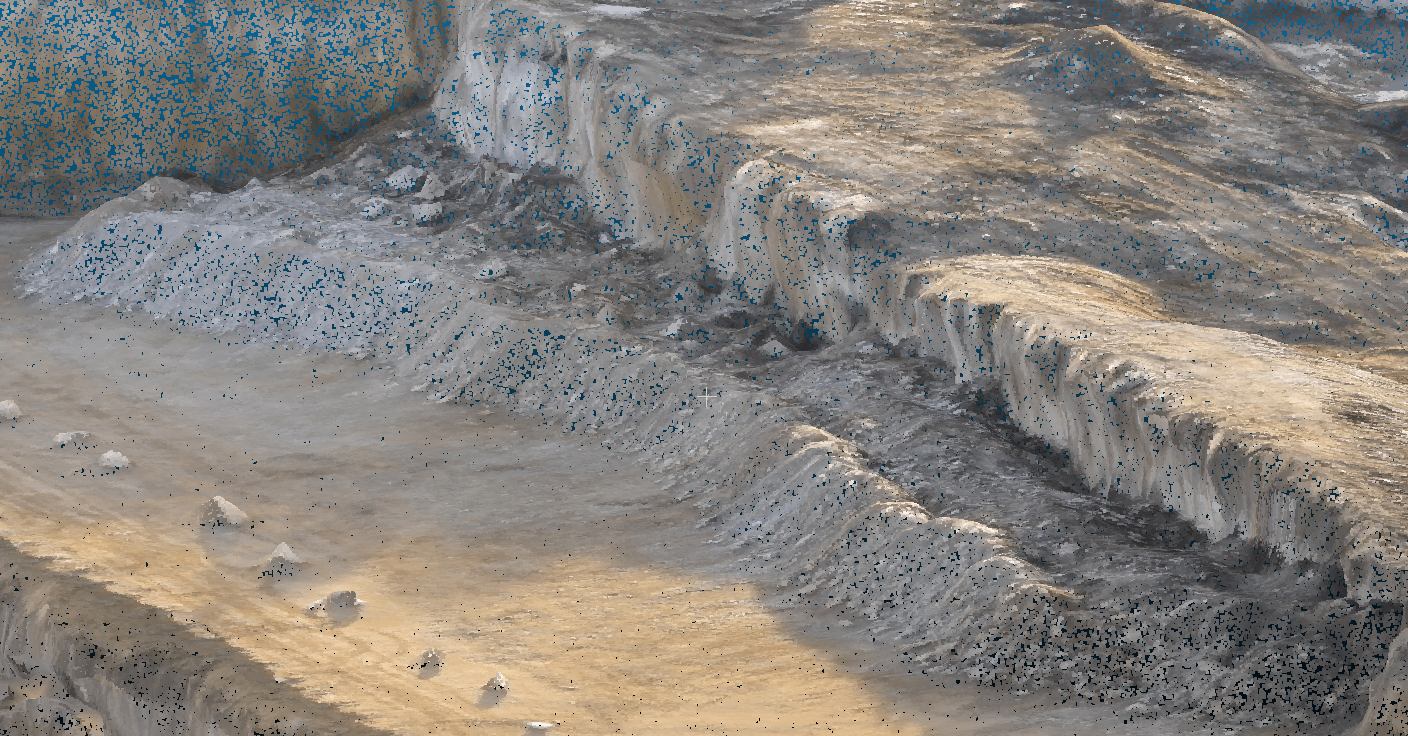
The other example is a more complicated situation. Let’s assume that you need to measure the volume of a stockpile in a mine or a construction site. The stockpile lean against an uneven, sloping wall plane. In this situation you cannot determine the volume of the stockpile with a simple plane, as your calculation will be burdened with a serious error. The problem is well illustrated in the following figure.
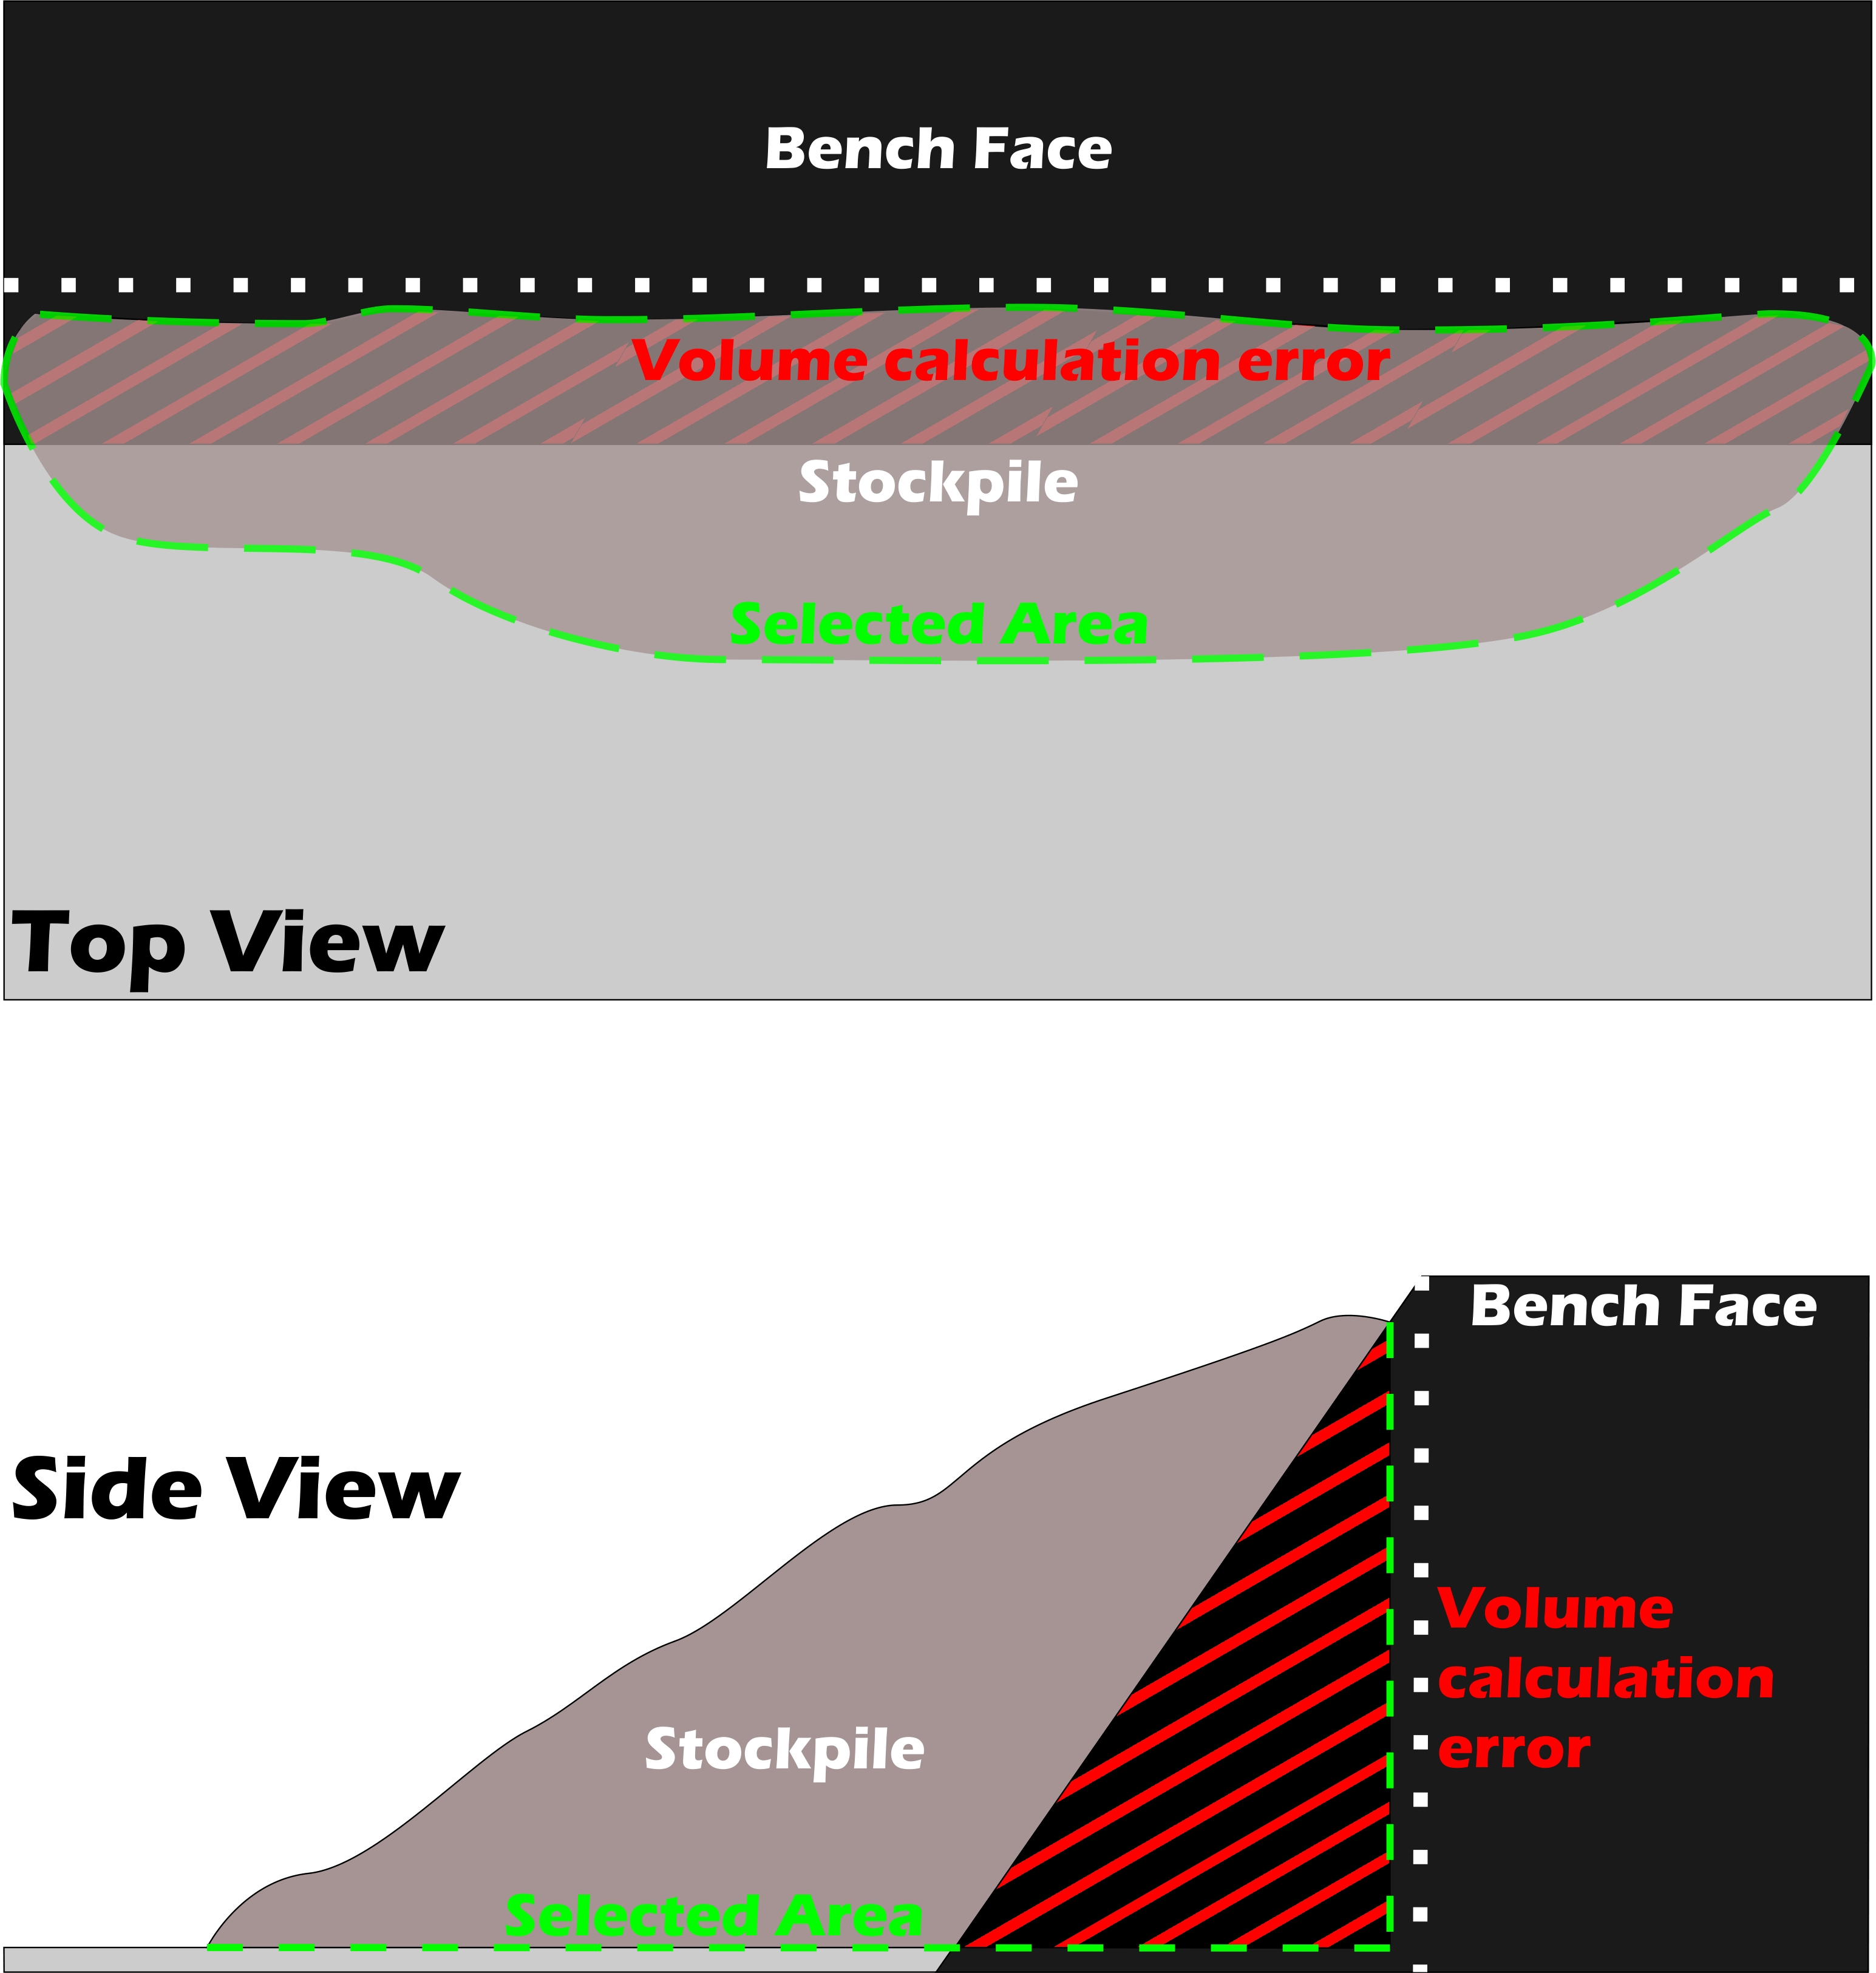
There are two possible solutions to this problem. You survey twice (the state before and after the stockpile), then compare these point clouds and measure the volume. The other solution is to mask the stockpile based on a point cloud (Stockpile in the figure) and interpolate a new surface in CloudCompare for the area with missing data (Volume calculation error in the figure). We will go over the latter possibility in the later sections of the article!
CloudCompare – Point cloud masking 1. – CSF Plugin
CloudCompare’s CSF (cloth simulation filtering) plugin has already been mentioned in an earlier article, but I will describe the essence of the method again. It often happens that you don’t need the surface of the entire point cloud (Digital Surface Model), but only the terrain (Digital Terrain Model), i.e., buildings, trees and other elements need to be masked.
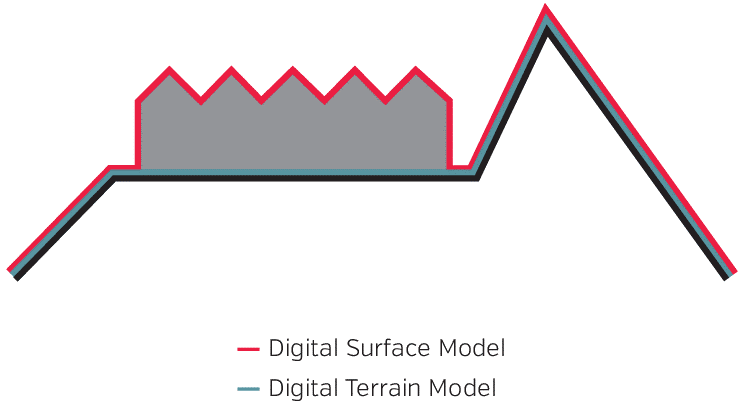
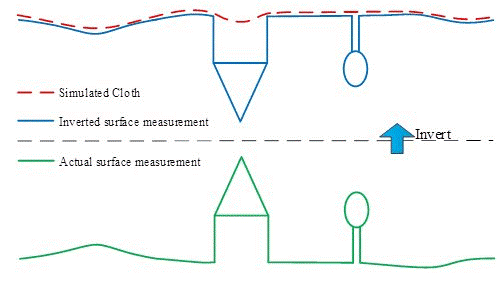
Apparently, it is not an easy task, but CloudCompare’s CSF (cloth simulation filtering) plugin helps in masking the point cloud. I will briefly describe what CSF does with the point cloud: it inverts the point cloud, and then places a virtual piece of clothing on top of it. Buildings, vegetation, and other objects appear as negative geometry on this inverted stock. The cloth only fits to a limited extent in these “recesses” of the point cloud. The mesh model of the cloth will represent the assumed terrain surface.
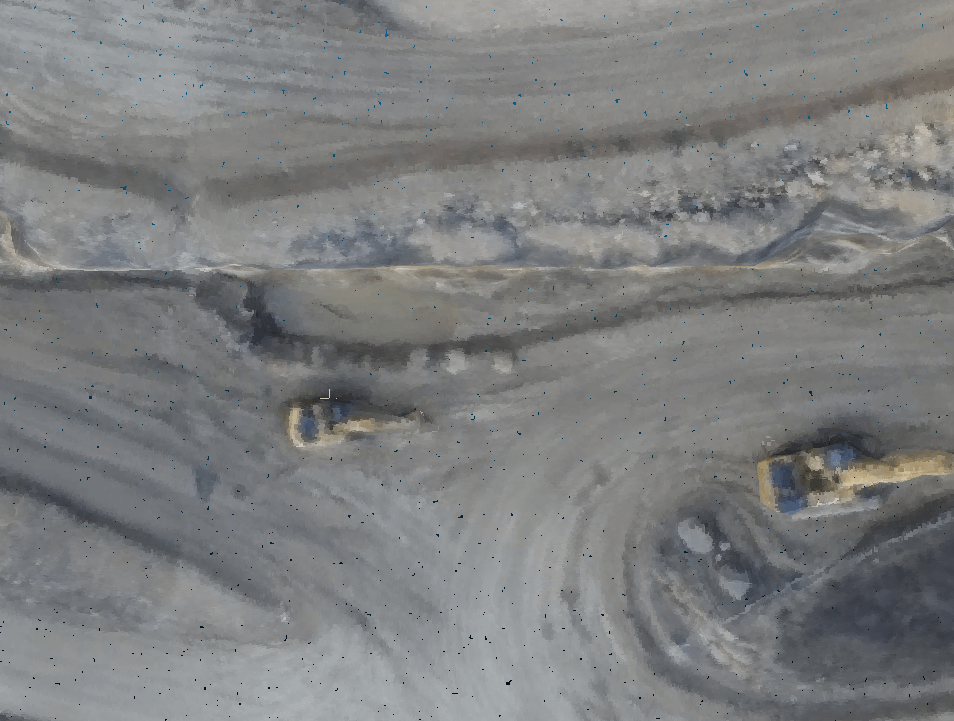
The CSF method is a good solution if you want to mask buildings, trees, or machinery. For the sake of the example, I masked two machines.

CloudCompare – Point cloud masking 2. – Manual solution
CloudCompare’s manual point cloud masking helps in measuring the previously mentioned complex stockpiles. Let’s see how to properly mask the stockpile in the following example and then measure its volume!
Sidenote: CloudCompare sometimes crashes during a session, so I recommend saving all your work regularly. You can do this by selecting all the layers in the DB Tree, then clicking on the floppy icon in the menu bar and saving a “.bin” file. Unfortunately, you have to do this the same way every time you save.
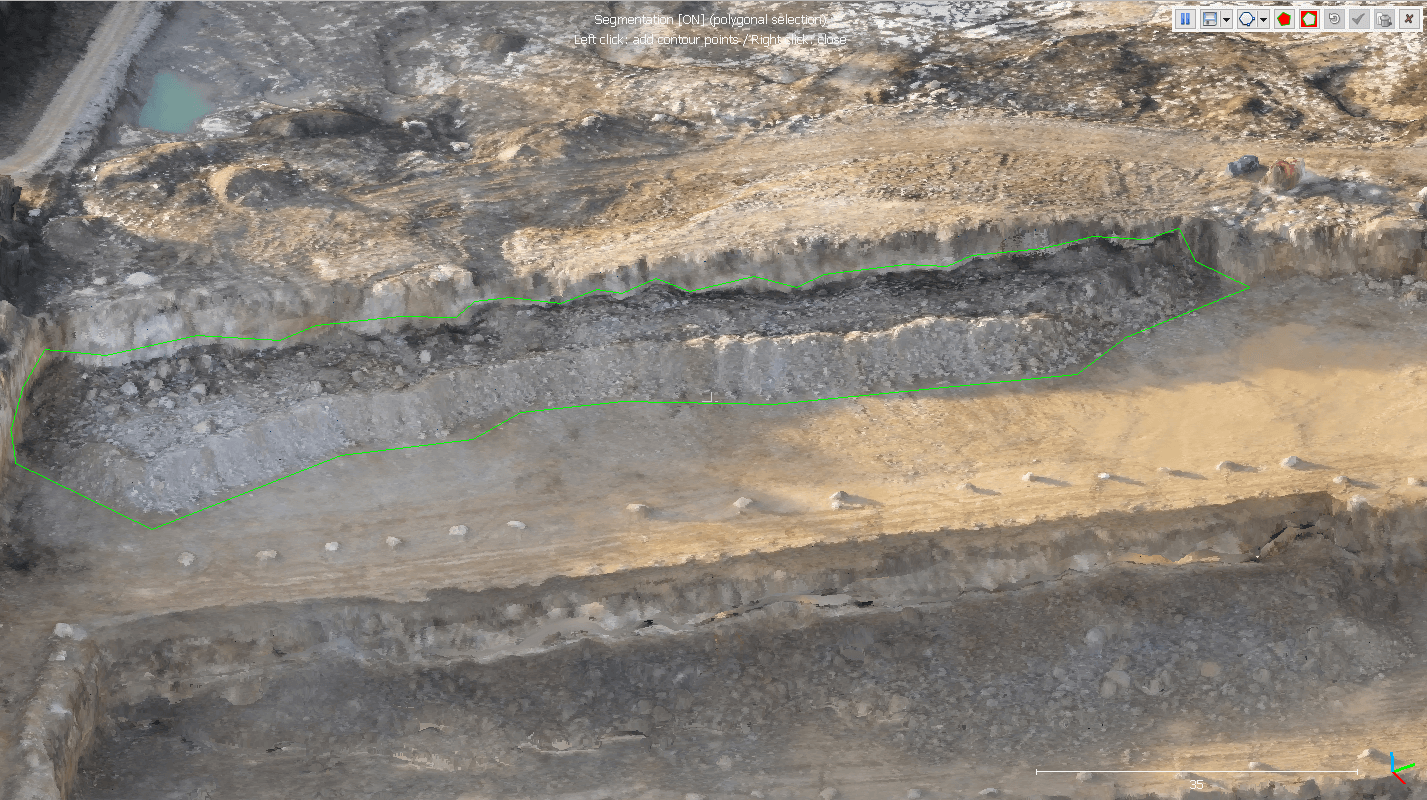
The first step is to open the point cloud you want to mask in CloudCompare. The Segment (![]() ) function can be used to outline the object you want to be masked. This tool is accessible from the top menu bar. When activated, a separate function window appears. At this point, you can begin to outline the terrain object to be masked. A vertex can be placed with the left mouse button and the shape can be closed with the right mouse button. You can then actually mask the point cloud with the Segment out (
) function can be used to outline the object you want to be masked. This tool is accessible from the top menu bar. When activated, a separate function window appears. At this point, you can begin to outline the terrain object to be masked. A vertex can be placed with the left mouse button and the shape can be closed with the right mouse button. You can then actually mask the point cloud with the Segment out (![]() ) button.
) button.
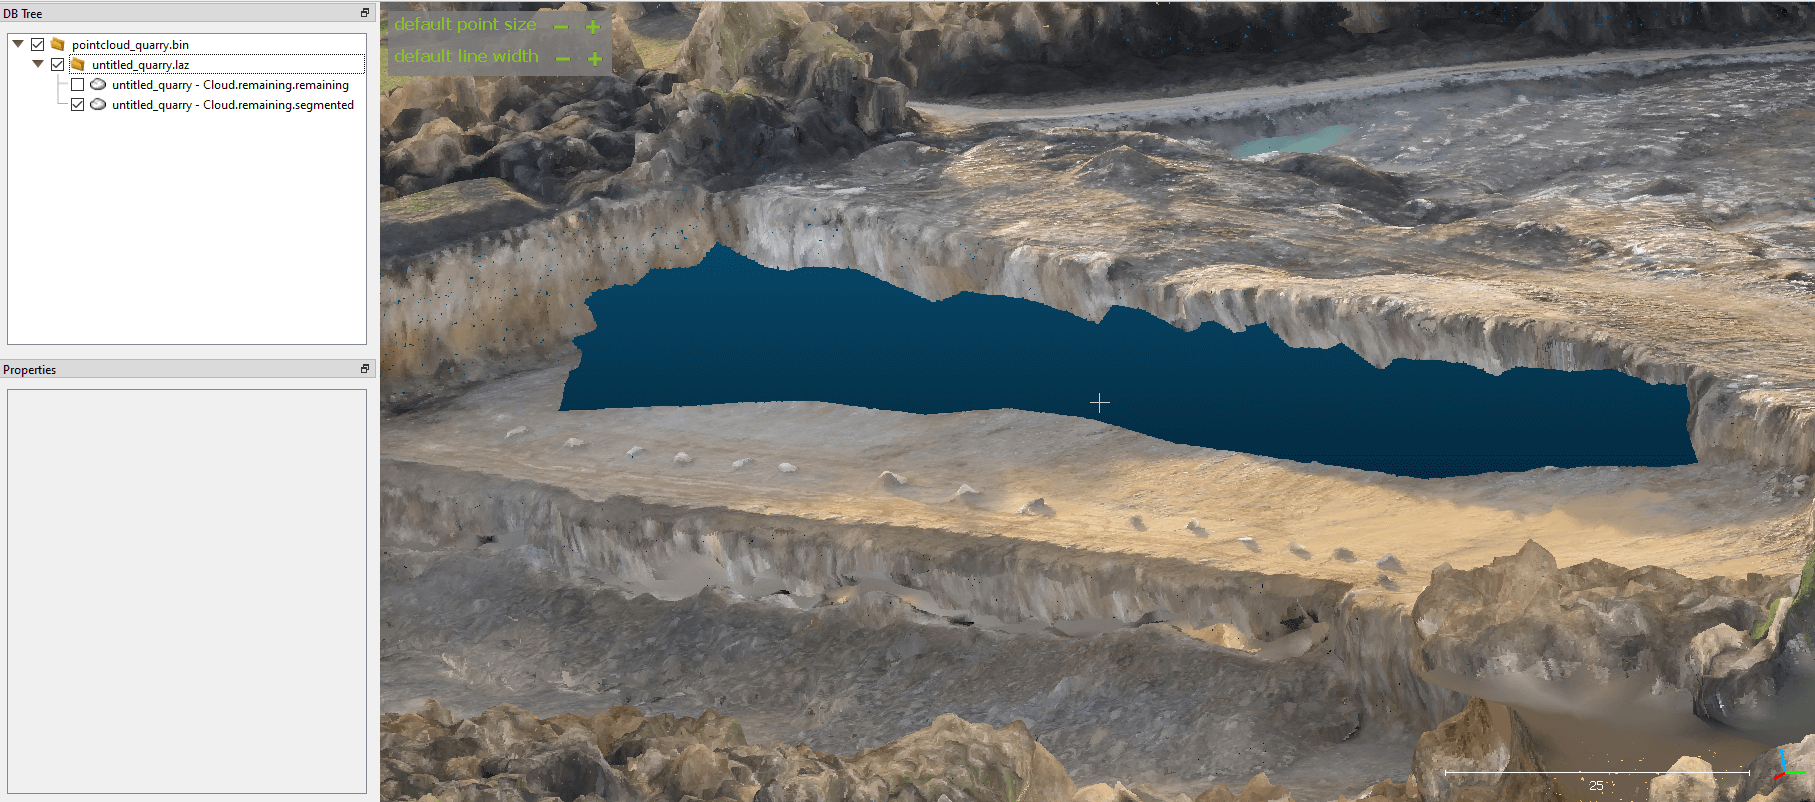
To finish the masking process, the Confirm Segmentation (![]() ) option must be selected. In this case, two point clouds appear in the CloudCompare DB Tree: masked (segmented) and remaining point cloud. I recommend that you do not delete the remaining point cloud (representing the stockpile), because it can still come in handy. 🙂
) option must be selected. In this case, two point clouds appear in the CloudCompare DB Tree: masked (segmented) and remaining point cloud. I recommend that you do not delete the remaining point cloud (representing the stockpile), because it can still come in handy. 🙂
CloudCompare – Interpolating missing data in a masked point cloud 1.
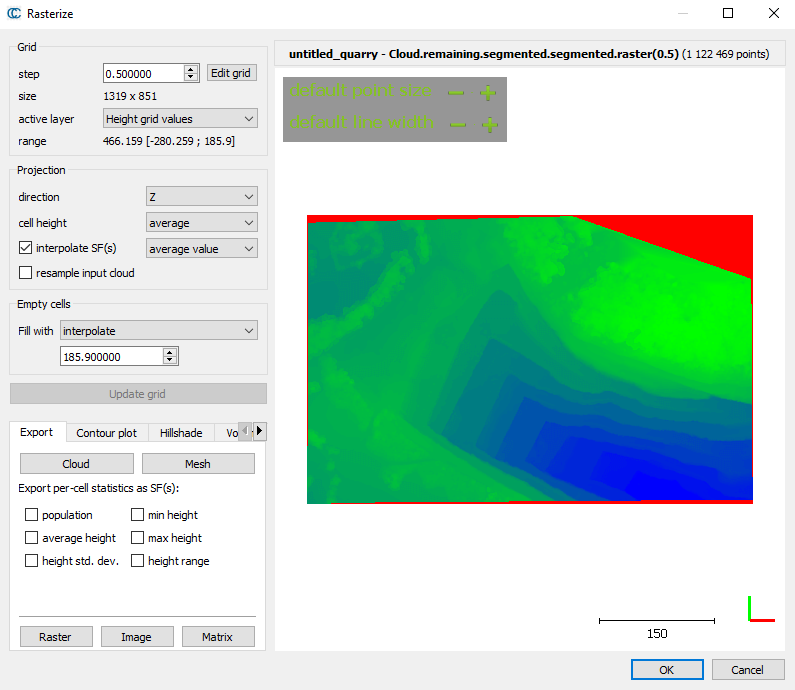
If an isolated object that is surrounded by nearly level surface, such as machine needs to be masked form the point cloud, it is sufficient to select the Rasterize function (![]() ) from the top menu bar. It is important here that you choose interpolation for filling the area with missing data (Empty cells/Fill with). By clicking on the big red Update grid button, a preview colored according to height value will appear. After all that, you can add the result to the layer tree of CloudCompare by clicking the Cloud button.
) from the top menu bar. It is important here that you choose interpolation for filling the area with missing data (Empty cells/Fill with). By clicking on the big red Update grid button, a preview colored according to height value will appear. After all that, you can add the result to the layer tree of CloudCompare by clicking the Cloud button.
The created new point cloud (blue) has nicely filled in the areas with missing data.
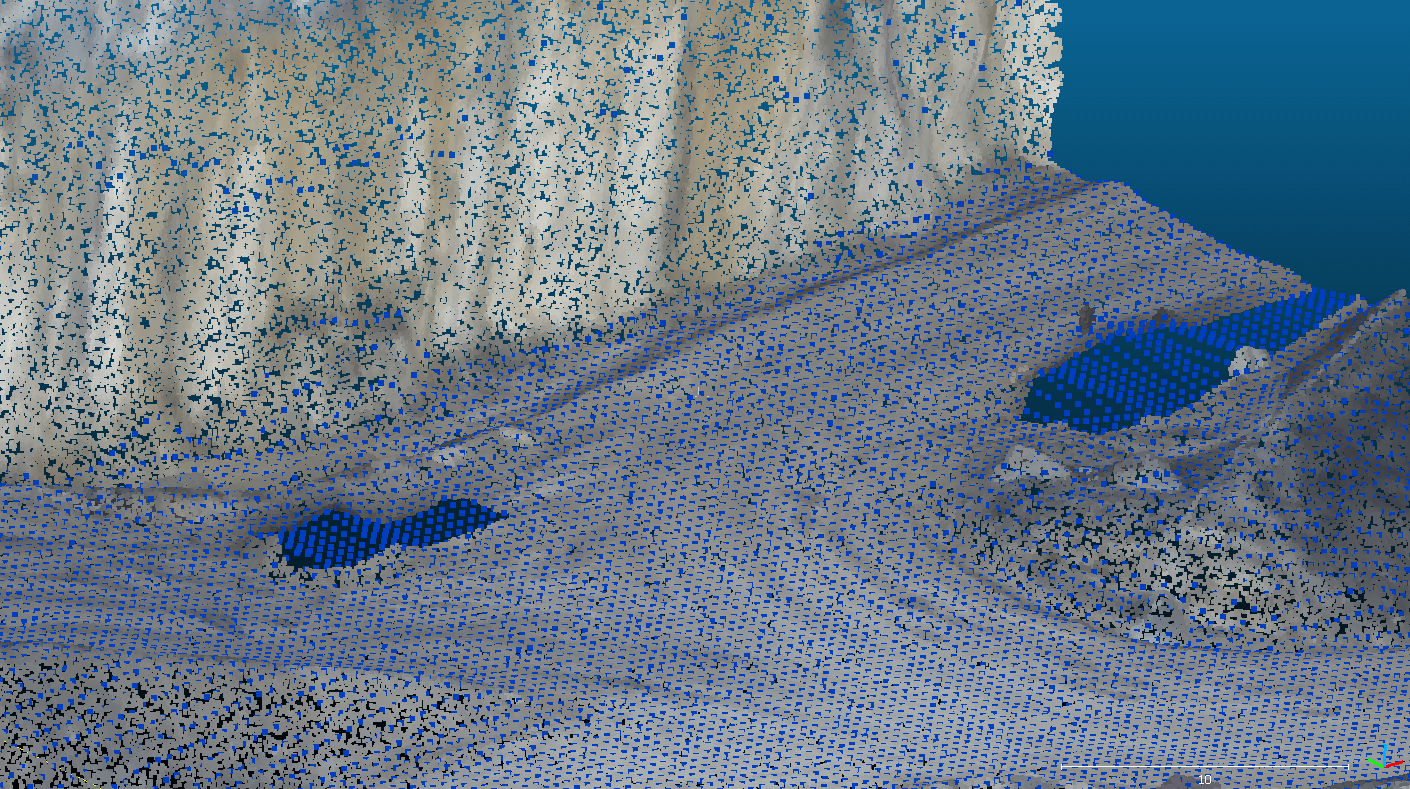
But what about the other masking case, can this method be used there as well? Interpolation is less successful in this area. Here, due to the masking, there is a large area with no available data and because of the difference in level between the upper and lower parts the algorithm “thinks” that there is a ramp-like slope in the intermediate part. In the next chapter, I will show you how to fix this on the point cloud!
CloudCompare – Interpolating missing data in a masked point cloud 2.
The problem outlined at the end of the previous chapter can be solved by placing substitute points on the point cloud remaining after masking. Let’s see it all in CloudCompare!Select the point cloud remaining after masking (displaying the stockpile) from the DB Tree, then select the Point list picking (![]() ) tool from the menu bar. With this tool, you can place points in CloudCompare by left-clicking on the point cloud. It is worth placing the points so that their X, Y coordinates follow the geometry of the slope. Obviously, this is a procedure based on the user’s estimation, but in most cases, it is easy to determine where the bottom of the bench face can be. The denser you place points, the more certain that you will get a good result with interpolation.
) tool from the menu bar. With this tool, you can place points in CloudCompare by left-clicking on the point cloud. It is worth placing the points so that their X, Y coordinates follow the geometry of the slope. Obviously, this is a procedure based on the user’s estimation, but in most cases, it is easy to determine where the bottom of the bench face can be. The denser you place points, the more certain that you will get a good result with interpolation.
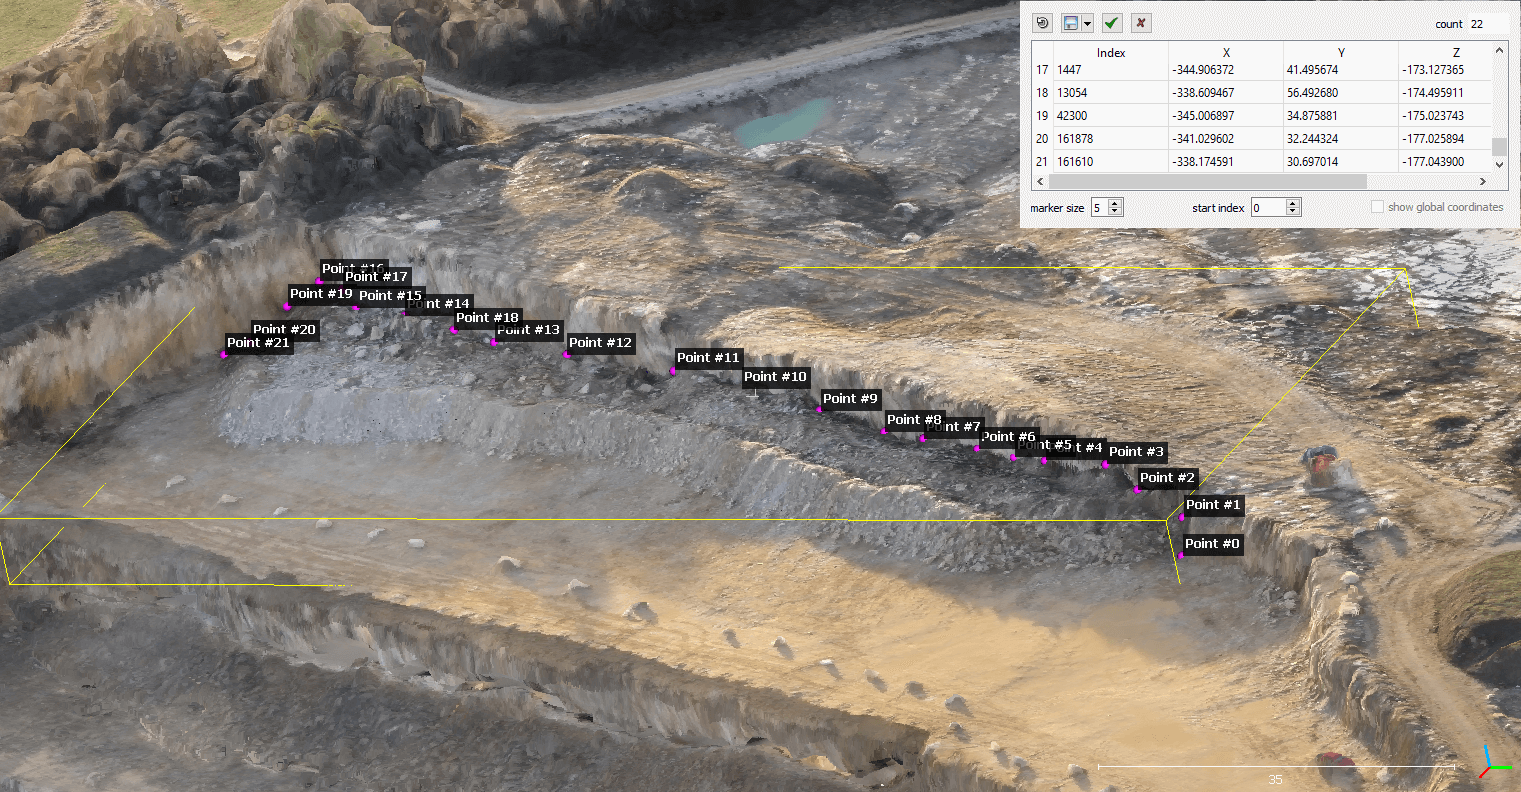
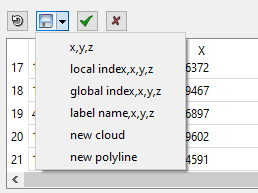
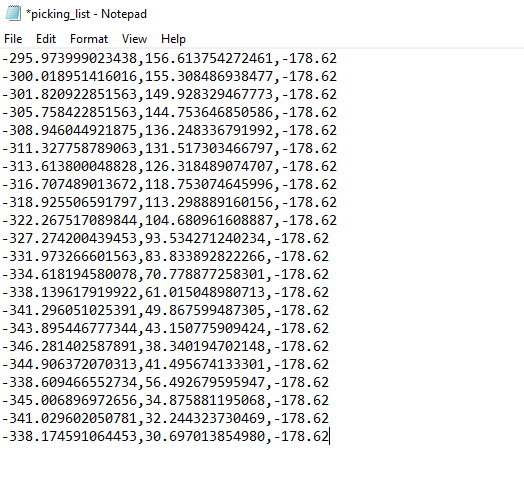
Within the Point list picking tool, you can save the points to a CSV file (x,y,z) under the floppy icon. Let’s do this!
Point list picking can be closed, and then by selecting the other masked point cloud (which lacks the stockpile) the Point list picking tool must be started. If we place points on the plane of the bench floor, we also get the values of the Z coordinates. For this example, it is -178.62.
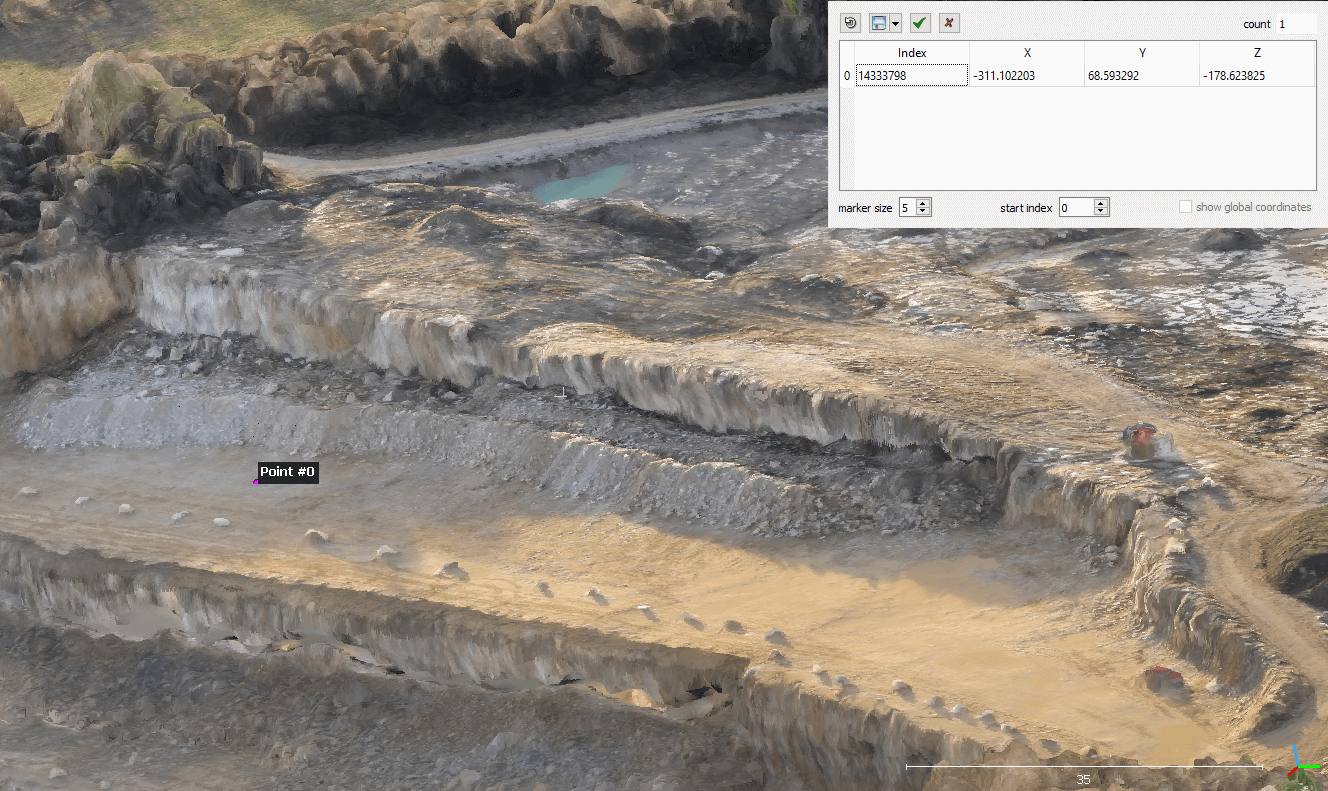
By opening the previously saved CSV file in Notepad or Notepad++, the values of the Z coordinates can be rewritten, where the values of the previously determined bench floor can be substituted.
Sidenote: If the bench floor slopes in one direction, it is advisable to place several points and query the height values several times.
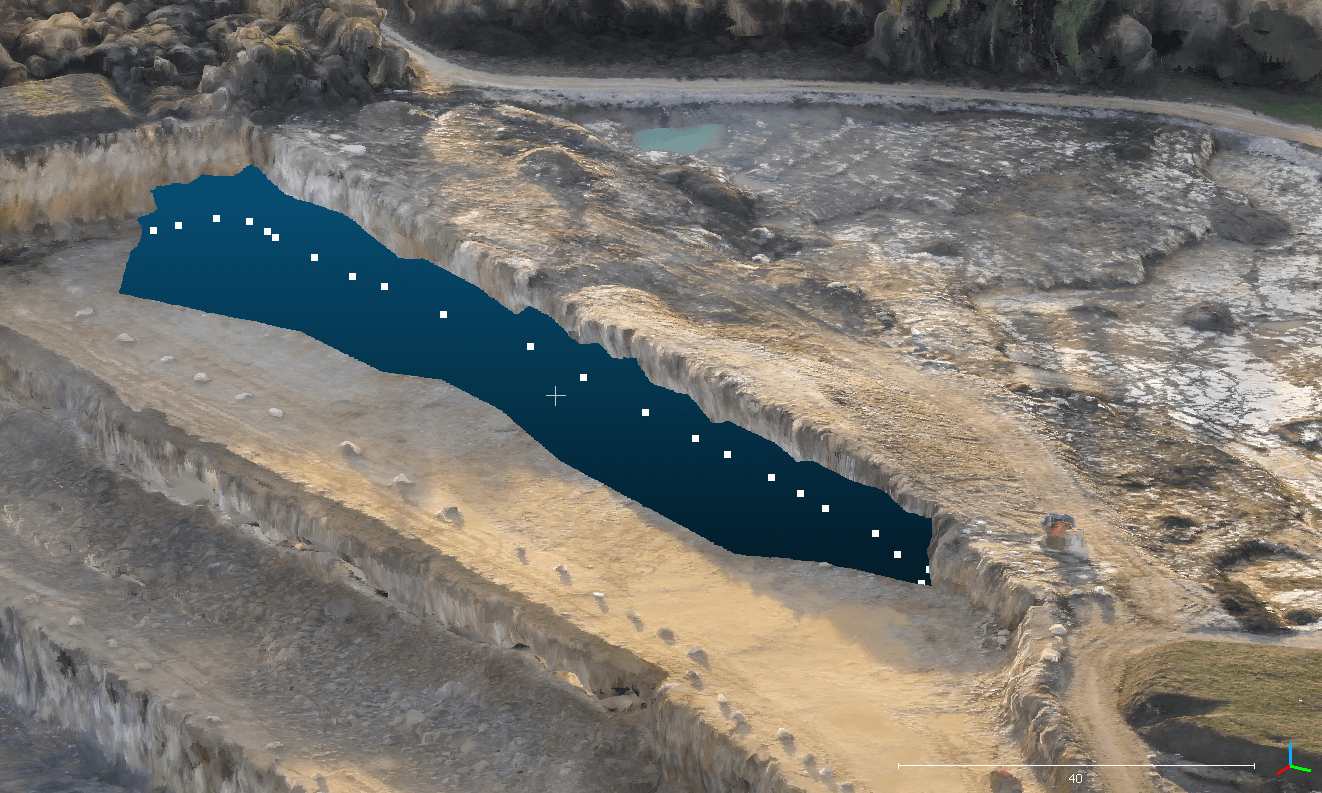
After saving the CSV file, it can be opened in CloudCompare, where the points are displayed as a point cloud.
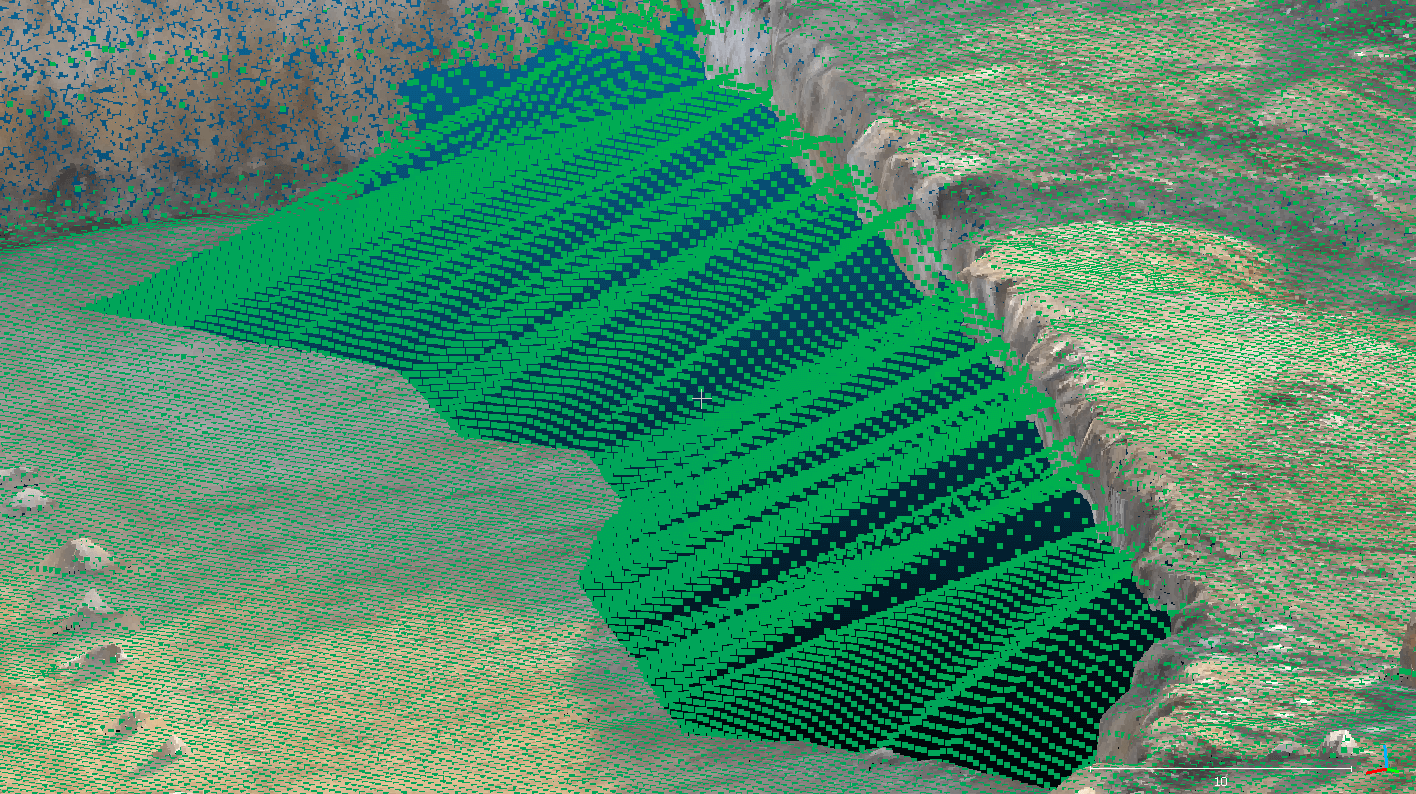
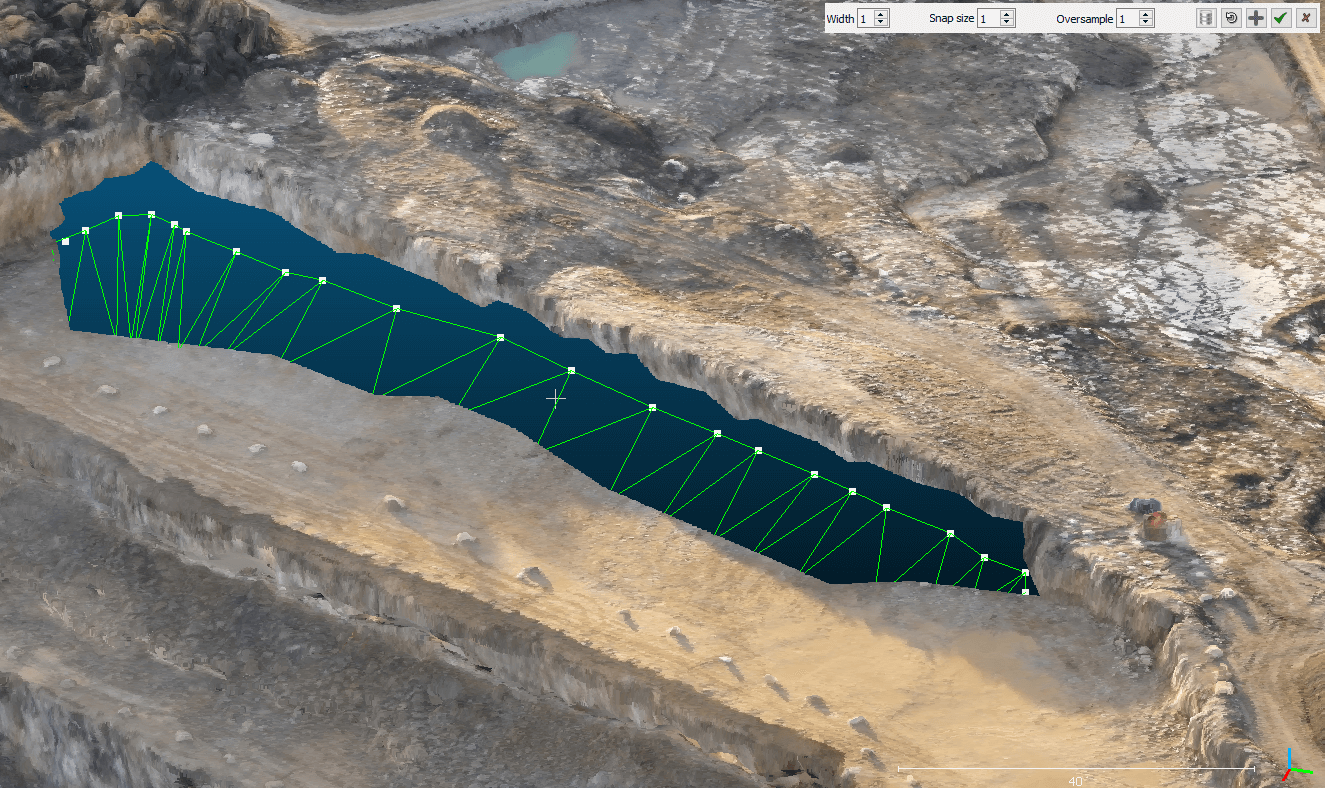
After all this, if we want to be sure that the interpolation does not create a faulty point cloud, then the lack of data occurring at the location of the masking can easily be filled with additional data. To do this, select the Trace polyline (![]() ) tool in CloudCompare, then connect the points of the plane visible on the masked point cloud with the points of the assumed bench floor. It is also recommended to connect the points of the assumed bench floor point cloud with each other according to the following pattern. When you are ready, press the Confirm button (
) tool in CloudCompare, then connect the points of the plane visible on the masked point cloud with the points of the assumed bench floor. It is also recommended to connect the points of the assumed bench floor point cloud with each other according to the following pattern. When you are ready, press the Confirm button (![]() ) in the context menu of Trace polyline.
) in the context menu of Trace polyline.
Select the new polyline in the CloudCompare DB Tree, then select the Edit/Polyline/Sample Points function. If you enter an arbitrary number of points and close the dialog box, CloudCompare creates points (a new point cloud) along the drawn line.

Note: If you have data on the nominal slope inclination (dip), you can create a simple plane in CloudCompare using the Edit/Plane/Create function. This allows you to refine the geometry of the slope. You can set the coordinates of the plane centroid, the dip direction, dip, height, and width. The resulting surface can be further adjusted using the Translate/Rotate function. Finally, point clouds can also be generated from the plane using the Sample Points function.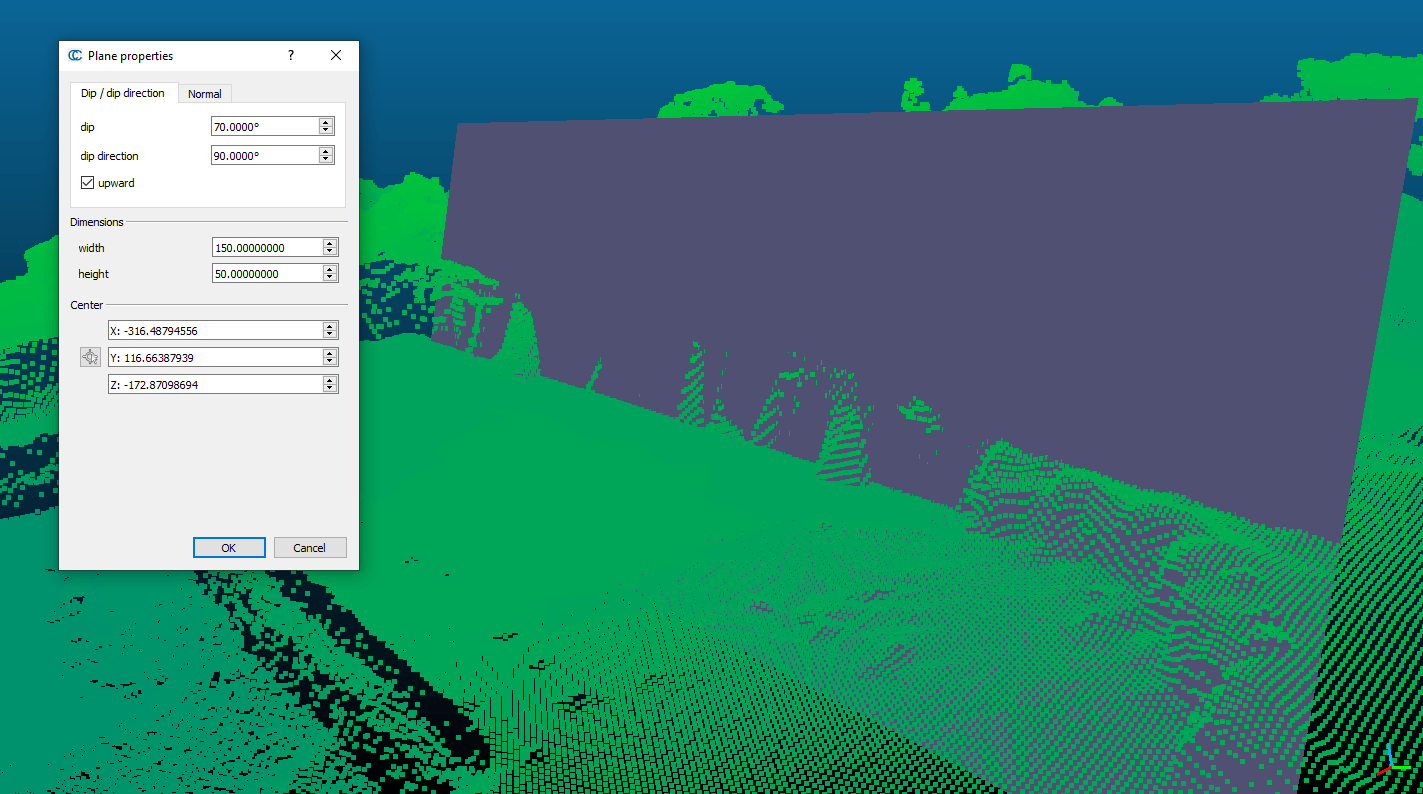
By selecting the point clouds (masked point cloud, Point list picking points, Trace polyline points (+ points of the plane)) in the CloudCompare DB Tree, the point clouds can be merged into a new one. To do this, select the Edit/Merge function. Then the Rasterize (![]() ) function can be run on the merged point cloud to interpolate.
) function can be run on the merged point cloud to interpolate.
Interesting fact: CloudCompare cannot set the original/derivative RGB coloring of the interpolation result, but this can be restored with post-processing even under QGIS with the tools in WhiteboxTools.
If you select the masked point cloud and the created interpolated point cloud, the volume of the stockpile can be calculated with the Tools/Volume/Compute 2.5D volume function.

Of course, these calculations also result in a variety of 2.5D and 3D files, which can be difficult to share. Try SurveyTransfer and experience how it is when you can easily share geospatial files with others!
If you really liked what you read, you can share it with your friends. 🙂
Did you like what you read? Do you want to read similar ones?