
The point cloud is a basic output file of both photogrammetry processing and laser scanning. CloudCompare was developed for operations on point cloud. We have already presented this program in several articles on our blog. CloudCompare is a free, open-source software that provides a great set of tools for analyzing point clouds. You can access the software by clicking HERE.
Sidenote: Maybe your antivirus will be a little hesitant and label CloudCompare as a dangerous program. I’ve been using it for years and it hasn’t caused any harm. If you think so, don’t install it, you can also follow the processing steps carried out on the point cloud in the article.
In this current article, you can learn the following point cloud manipulation tricks:
- CloudCompare: Point cloud cleaning and 3D mesh generation;
- CloudCompare: Point cloud filtering – automated ground level and building filtering using the CSF plugin;
- CloudCompare: Creating raster files from a point cloud.
If you’re interested in CloudCompare and operations on point clouds, don’t forget that we’ve written about this topic before:
- FOR WHAT AND HOW YOU CAN USE GEOSPATIAL DATA?
- 4 SIMPLE AND PROFESSIONAL WAYS TO CALCULATE VOLUME BY POINT CLOUD AND DEM
- GIS-BASED BUILDING MOTION ANALYSIS STEP-BY-STEP
The output files of the CloudCompare process can be large point clouds, orthomosaics, digital elevation models (DEM) and 3D models. These can be difficult to share with the client and colleagues. It is strongly recommended to use the SurveyTransfer data sharing software! For more information, visit the website of the software manufacturer by clicking HERE.
CLOUDCOMPARE: POINT CLOUD CLEANING AND 3D MESH GENERATION
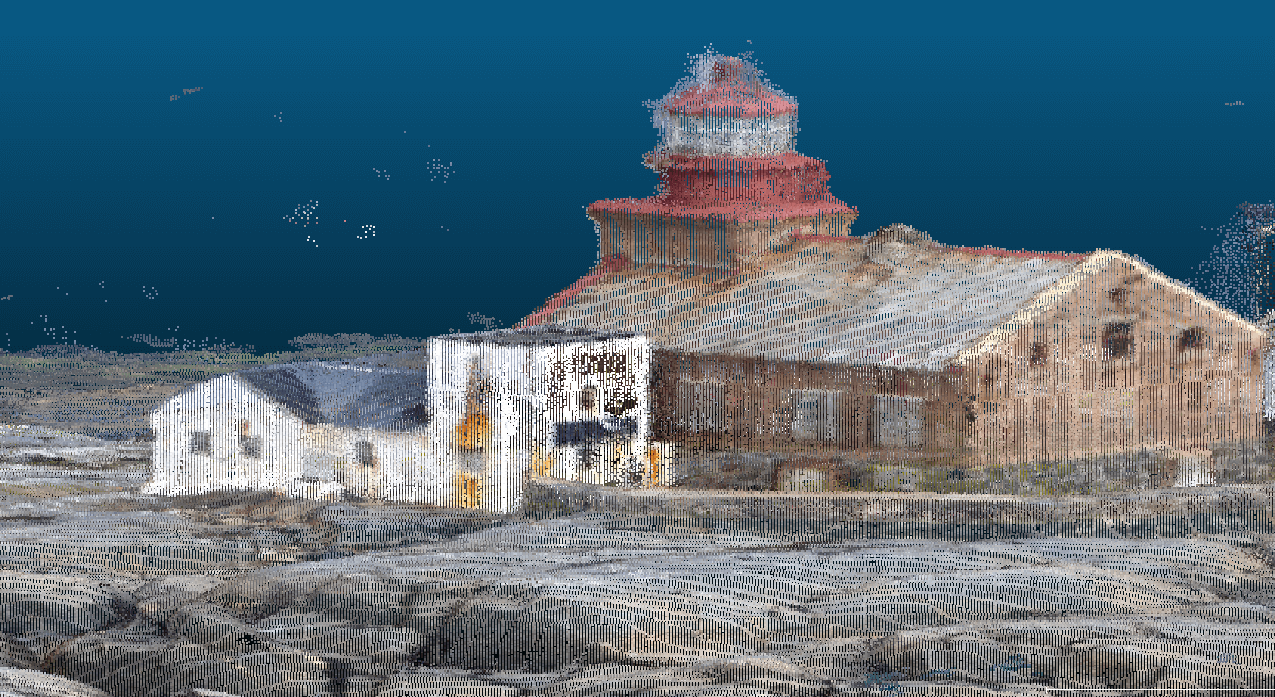
Why and from what do you need to clean the point cloud? In many cases, noise is generated during the processing, which manifests itself as points appearing in the wrong place in the point cloud. You can see in the image below (displayed in CloudCompare) that a separated row of points was created, and noise was created in addition to the real geometry.
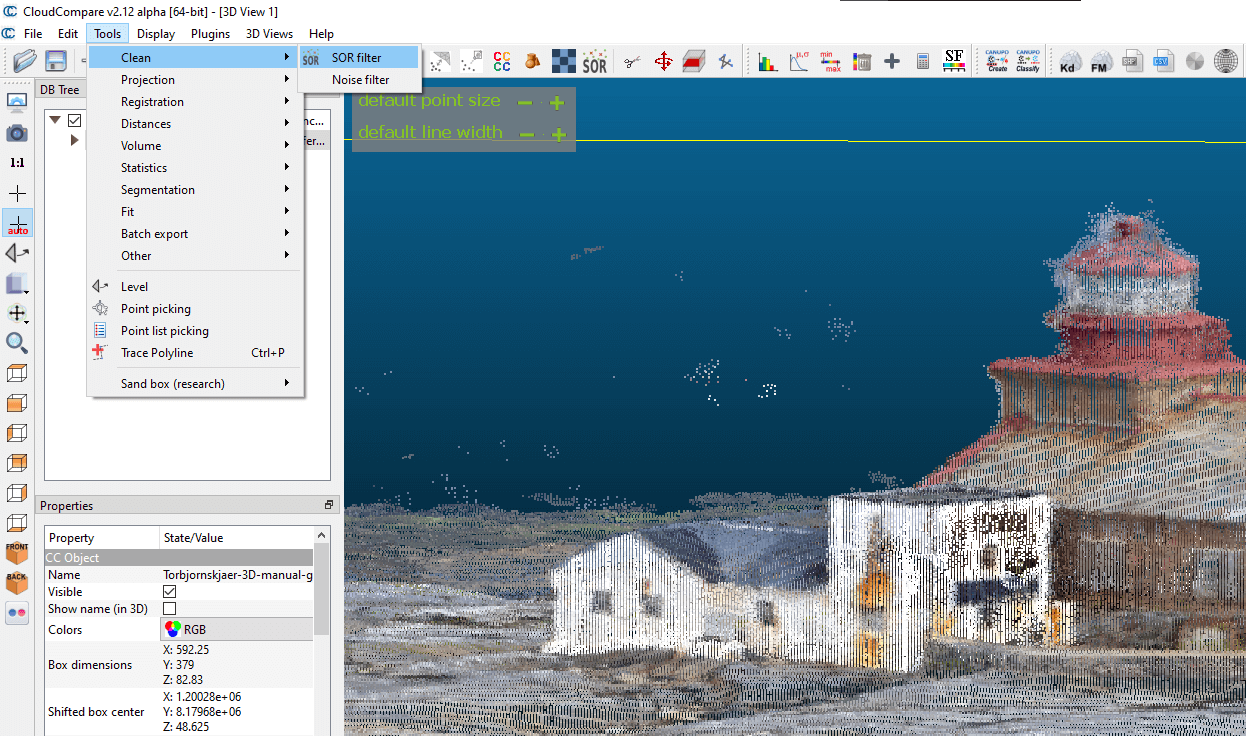
To get rid of the noise, select the point cloud within CloudCompare, then select the menu item “Tools/Clean/SOR filter”
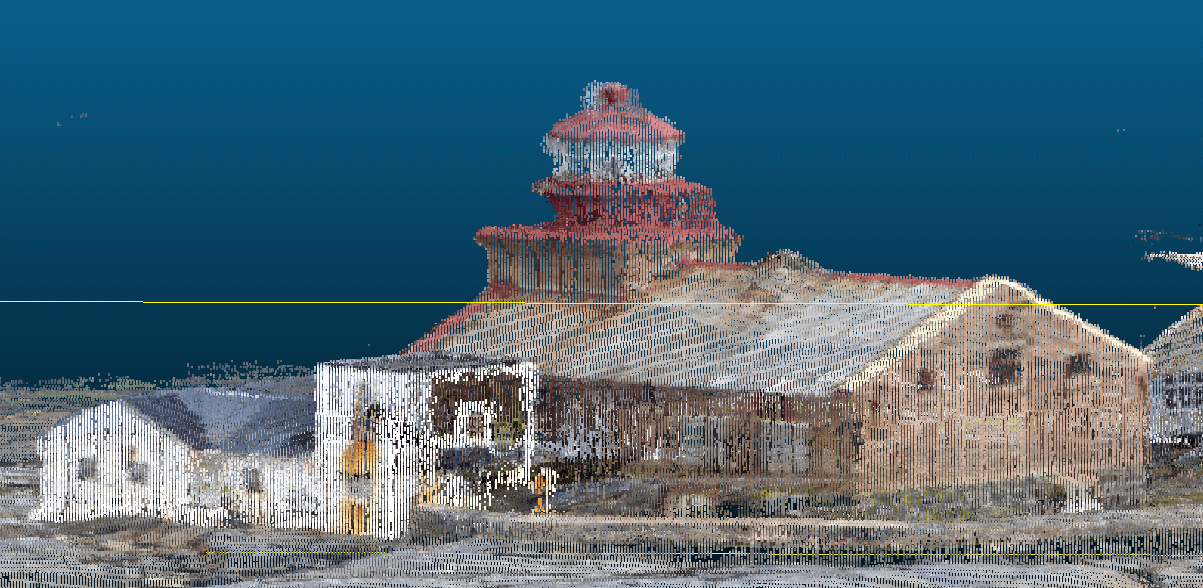
Try the default setting here or feel free to experiment with the parameters you specify. Testing will not affect the original point cloud! I will now show you what this CloudCompare filter can do with the basic settings. Even in this form, the result is much better compared to the previous one.
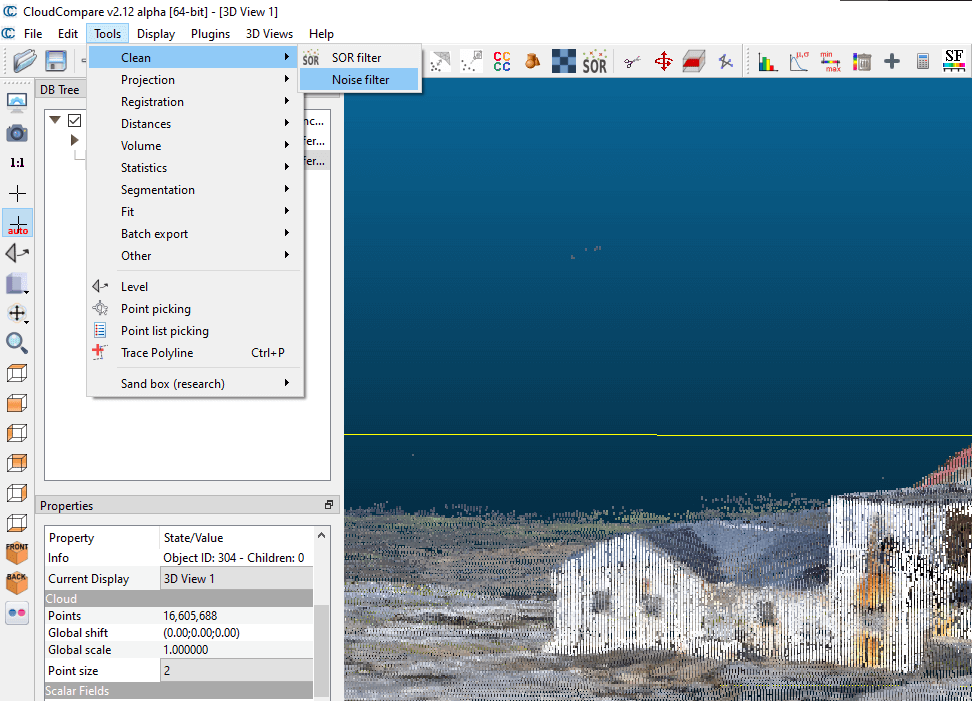
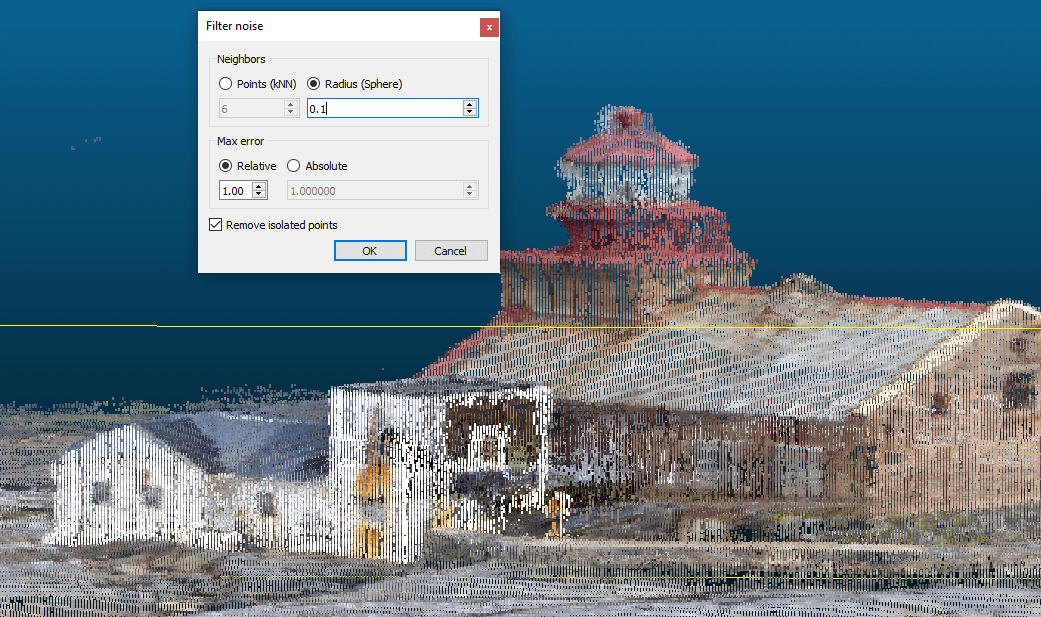
Let’s shape it some more! Select the new point cloud and select the “Noise Filter” option from the “Tools/Clean” menu.
Here, in case there are a lot of distinct points, it might be worth entering a slightly smaller number for the search.
Sidenote: If you are not sure that your point cloud has normals, then before generating the 3D mesh, it is worth calculating the normals of the point cloud. You can do this within CloudCompare in the “Edit/Compute/Normals” menu. Here you can even run this function on basic settings. In some cases, this calculation can take a very long time (hours).
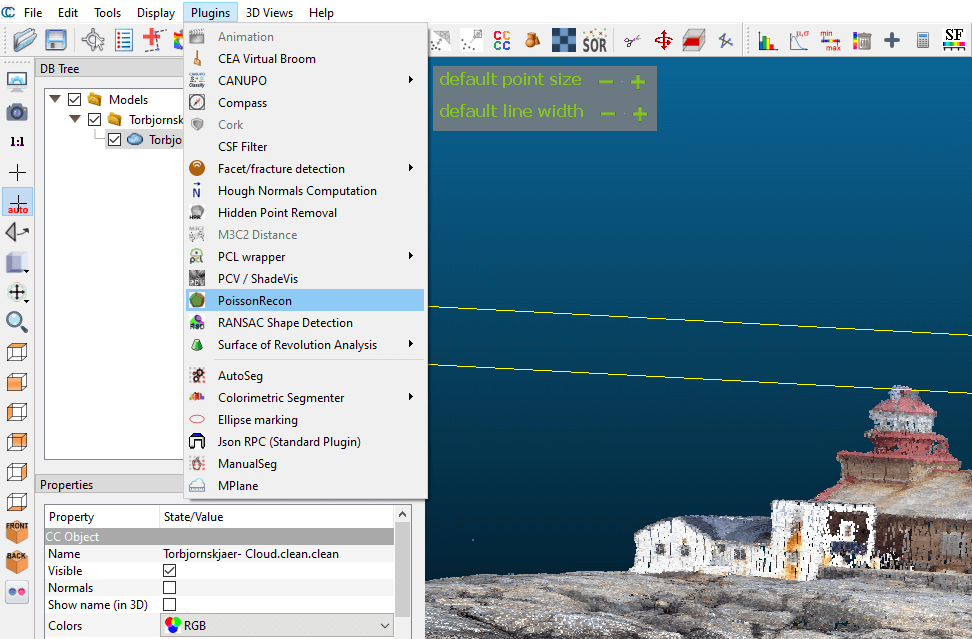
Select the menu item Plugins/PoissonRecon to create a 3D mesh from the point cloud. Yes, CloudCompare knows that too! 🙂
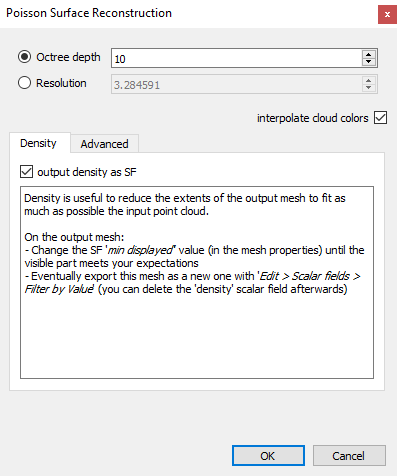
Here you should set the parameters shown in the following image. It is advisable to use the “Octree depth” value between 8-10, otherwise CloudCompare will work for a long time.
The result is, well… not very promising at first glance…
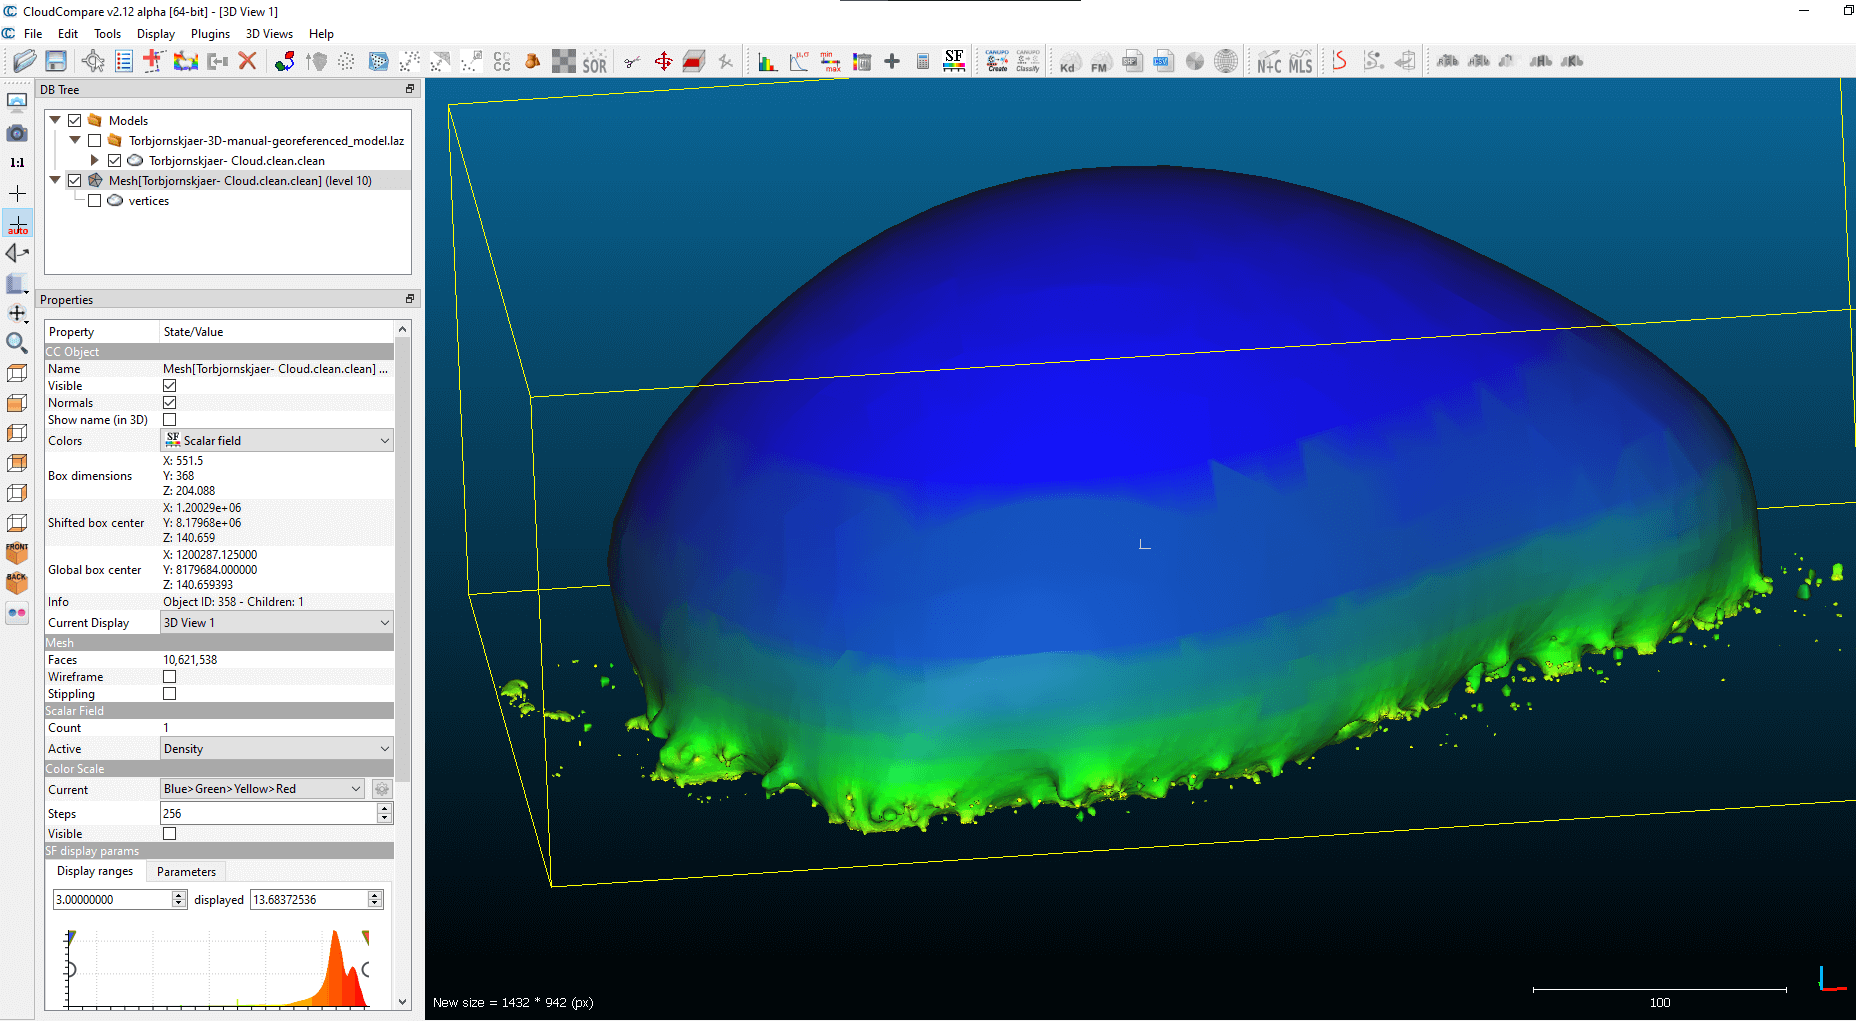
CloudCompare Poisson reconstruction attempts to close the geometry into a solid. If we get rid of the parts of the space that are unnecessarily formed for us, then we get a very good result!
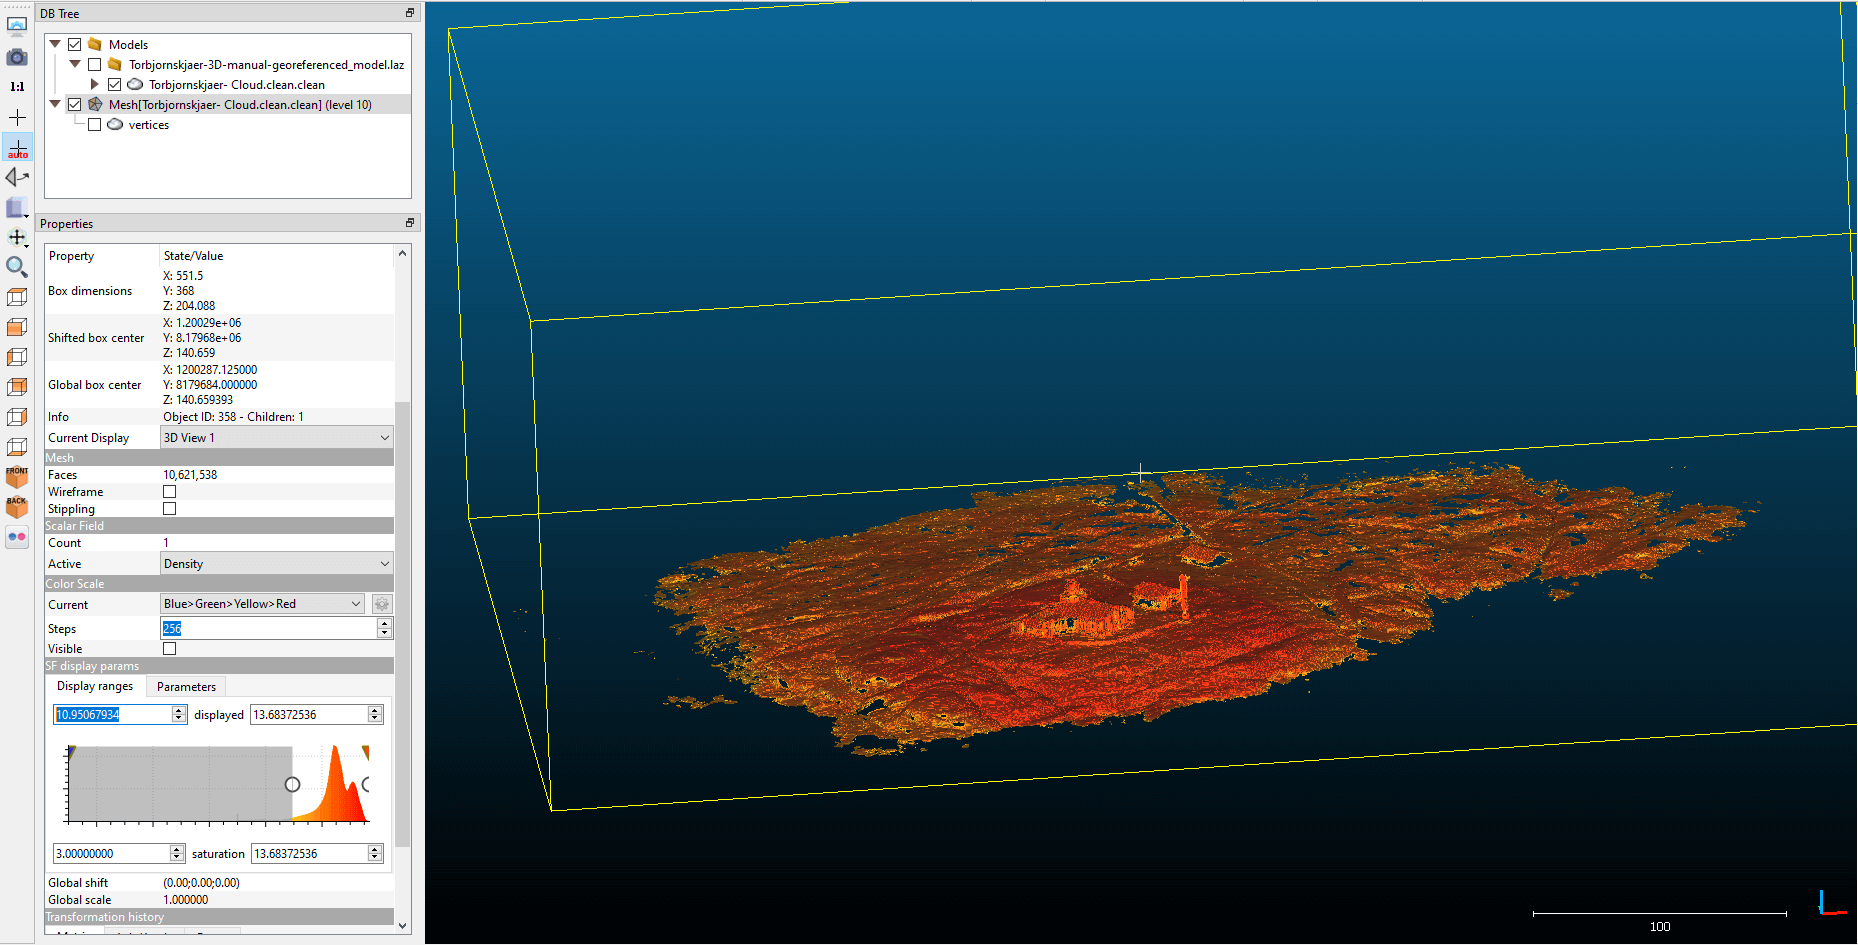
Select the mesh layer in the layer tree, then scroll down to the “SF display params” section in the “Properties” menu under the layer. Here you can see a distribution diagram, the lower and upper limits of which you can freely set using a slider. If you set the minimum higher, you can remove the unnecessary parts.
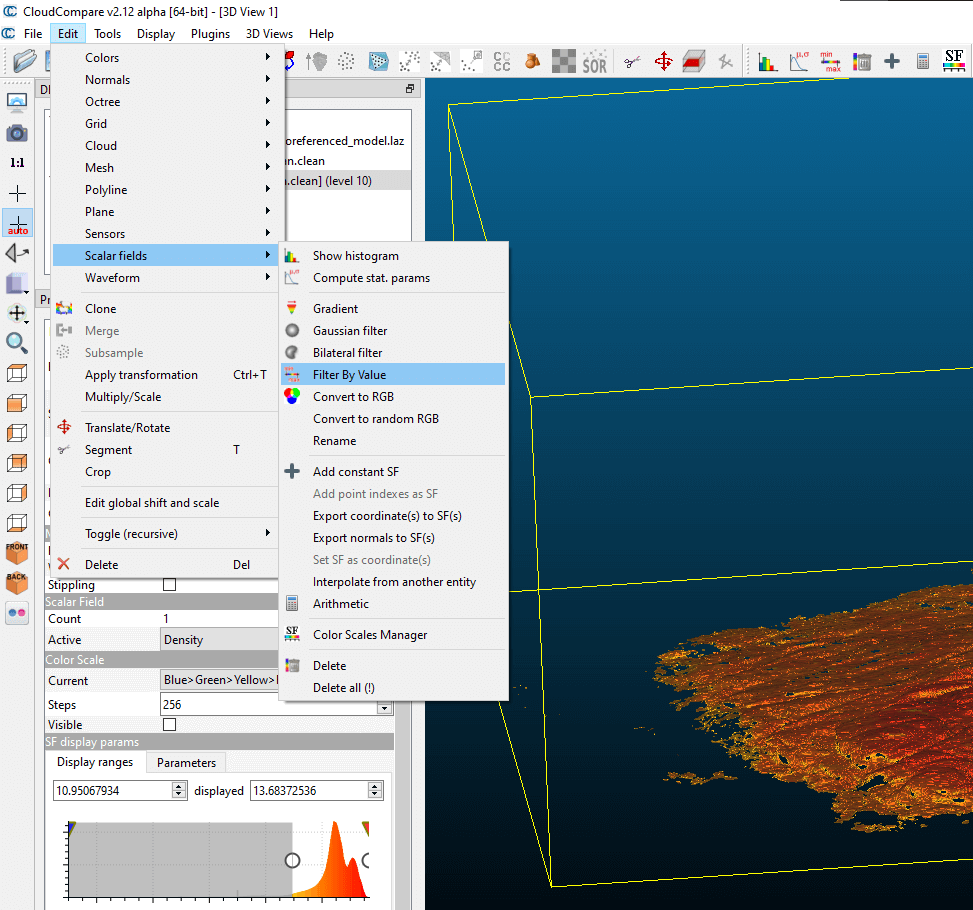
Then we create the final mesh, from which we delete the interfering parts. Go to the “Edit/Scalar fields/Filter By Value” menu. This is a very useful CloudCompare function, applicable in many cases for point clouds as well (e.g., filtering according to height data).
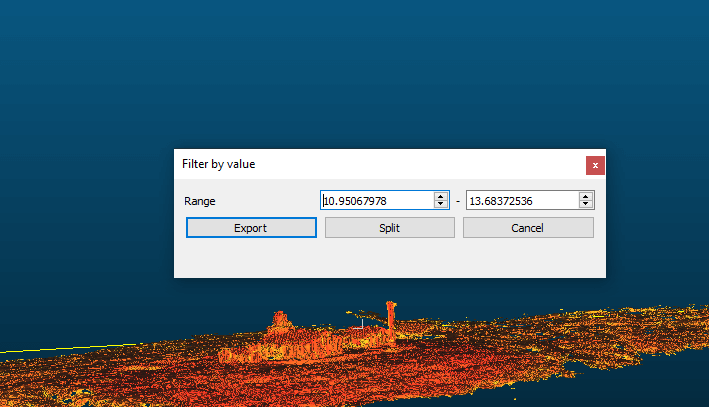
The bottom value of the pop-up window will already inherit the previously set data. Here you can decide whether to export (Export) from CloudCompare or just separate (Split) the interfering part and the valuable mesh into separate layers.
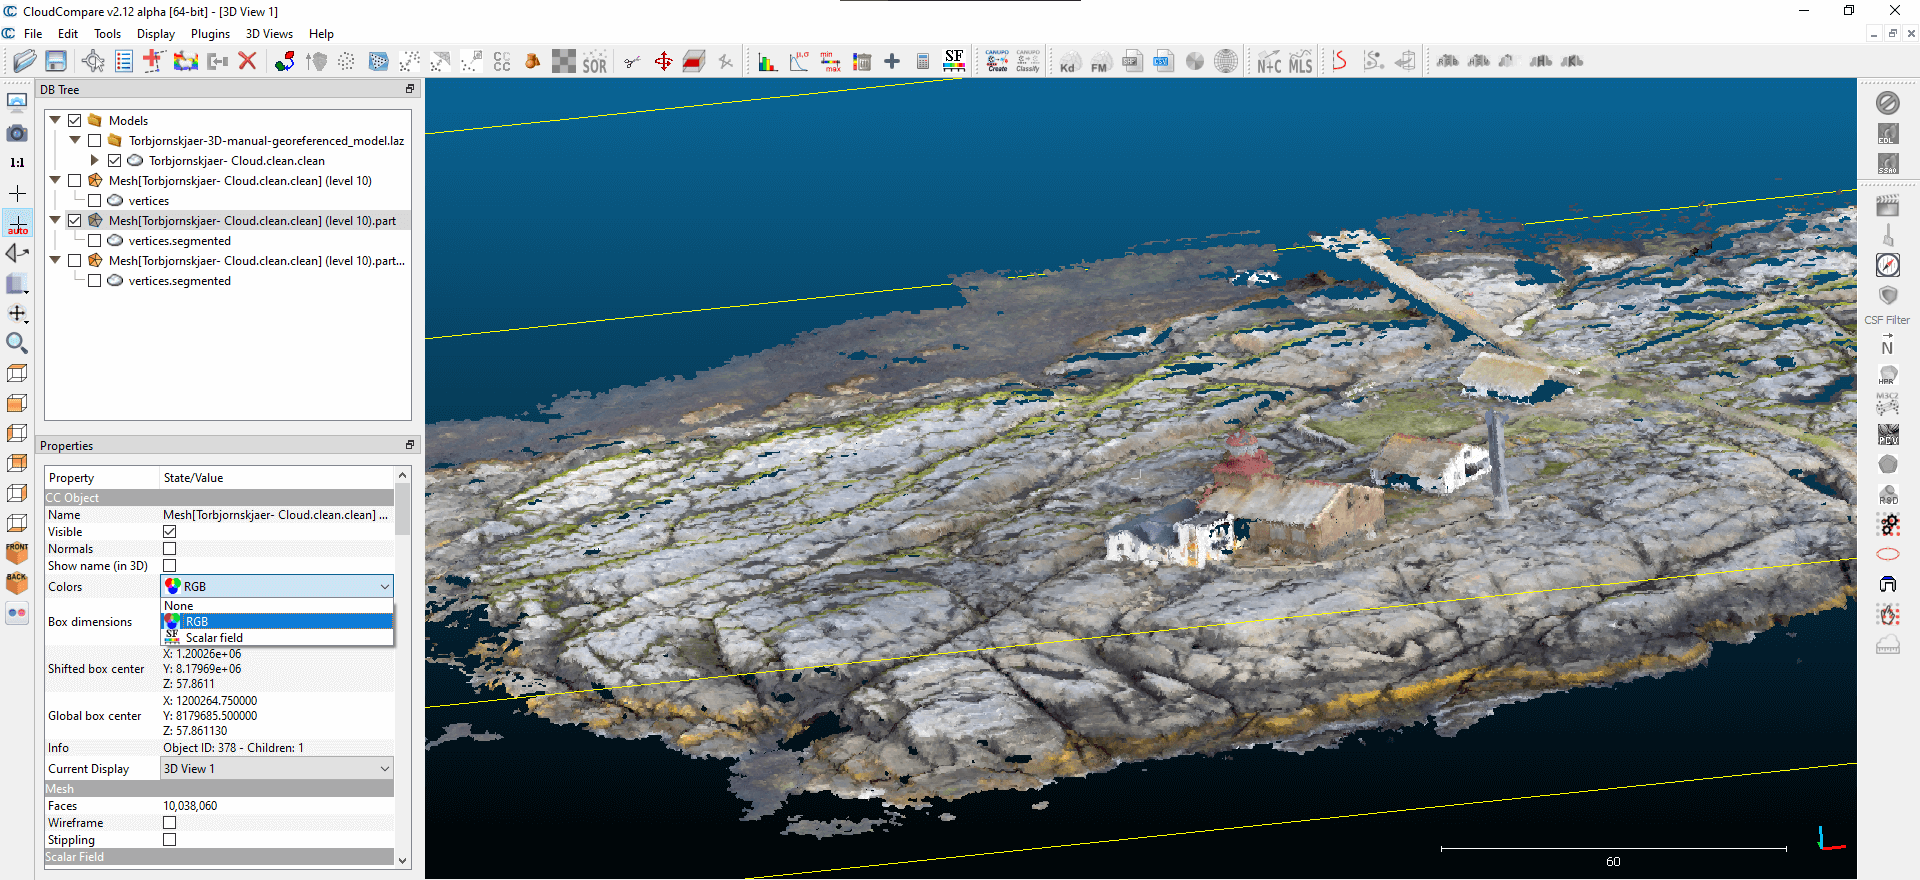
For the sake of the example, I chose the option “Split”. If you do not want to color the result according to height, you can also display the mesh according to the RGB colors inherited from the point cloud. To do this, select the layer, then select RGB from the “Properties” menu under “Colors”.
POINT CLOUD SORTING – AUTOMATED GROUND LEVEL AND BUILDING FILTERING USING THE CSF PLUGIN
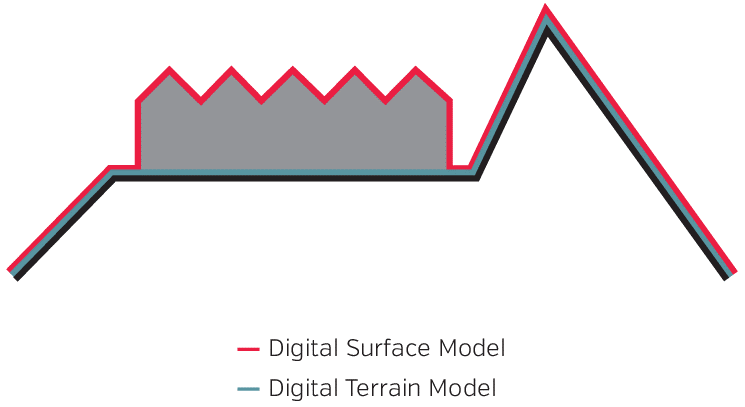
It often happens that you don’t need the surface of the entire point cloud (Digital Surface Model), but only the properties of the terrain surface (Digital Terrain Model).
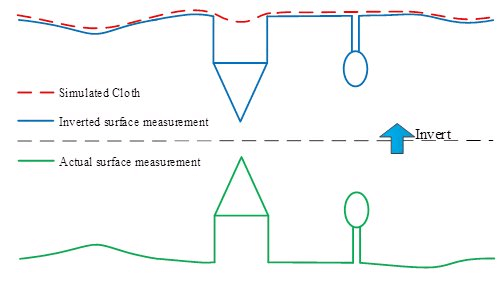
Apparently, it is not an easy task, but CloudCompare’s CSF (cloth simulation filtering) plugin helps in filtering the point cloud. I will briefly describe what CSF does with the point cloud: it turns the entire surface of the point cloud upside down, and then places a virtual piece of clothing on it. Buildings and vegetation appear as negative geometry on this inverted surface. The cloth only fits to a limited extent in these “recesses” of the point cloud. The mesh model of the cloth will represent the assumed terrain surface.
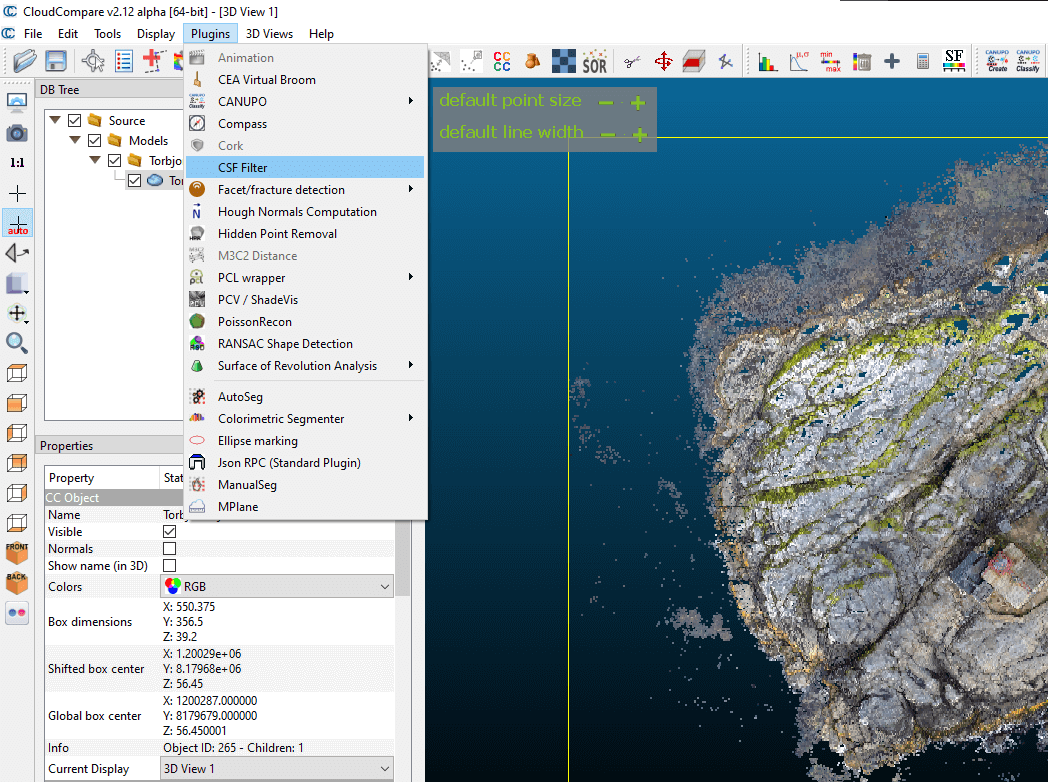
Let’s see all this in practice, that is, in CloudCompare! Select the point cloud, then select the “Plugins/CSF Filter” function.
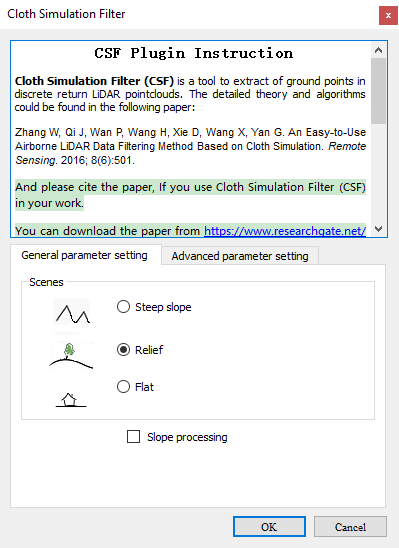
Depending on the characteristics of the surveyed area, choose what suits you best:
- Steep slope – In the case of steep slopes;
- Relief – for hilly areas;
- Flat – for flat areas
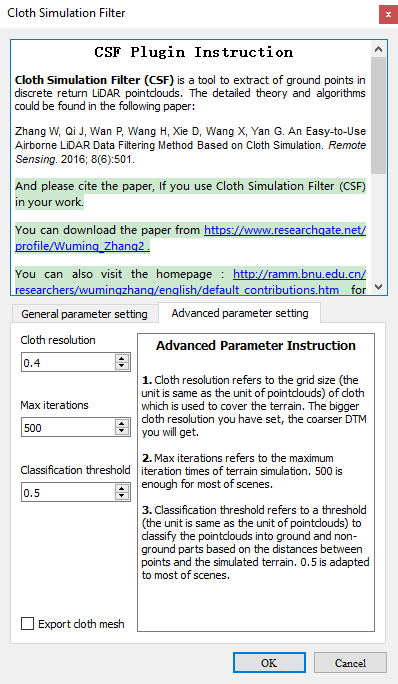
If you want to filter out steep slopes, turn on the “Slope processing” option, because this helps the CloudCompare CSF algorithm better identify steep slopes within the point cloud.
I recommend that you enter a smaller value for the “Cloth resolution” parameter under the “Advanced parameter setting” tab. This allows you to increase the resolution of the cloth, which will fit the point cloud better. Just carefully! “Cloth resolution” values of 0.3 and below can dramatically increase CloudCompare’s calculation time.
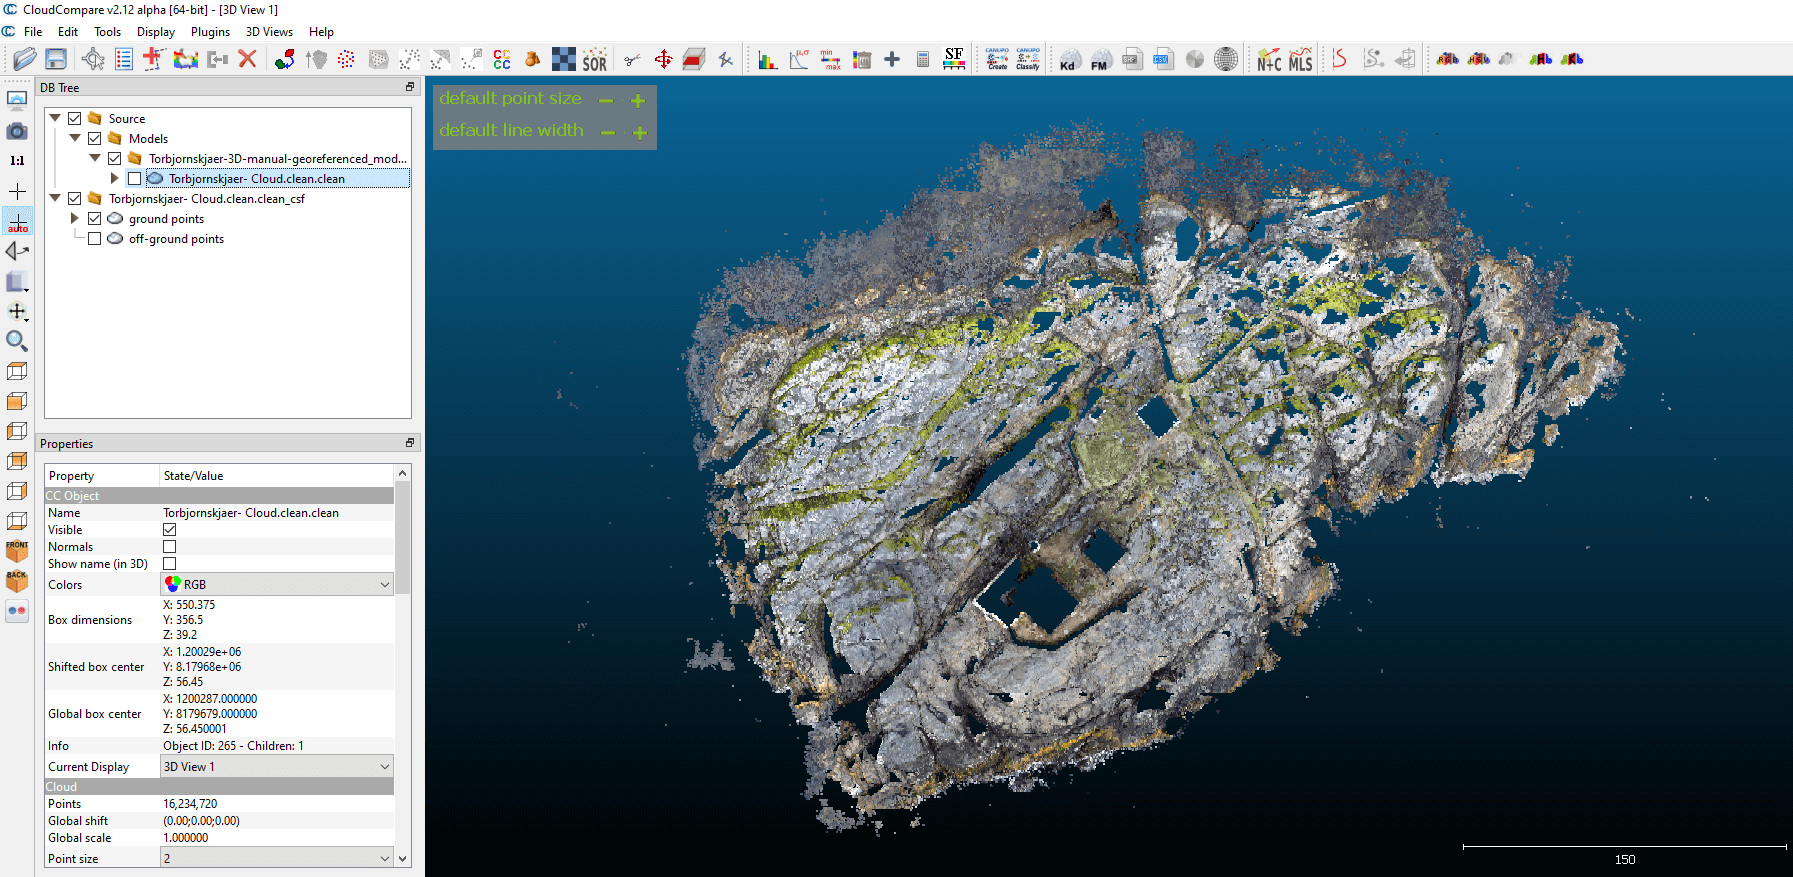
The result is displayed as two separate point clouds in CloudCompare: one that represents the terrain surface and another that represents the objects located above it (e.g. buildings, vegetation).
Sidenote: If you are interested in how to make a raster DTM from this point cloud terrain surface, then read on! In the “CloudCompare: Creating raster files from a point cloud” chapter, we cover this as well.
CLOUDCOMPARE: CREATING RASTER FILES FROM A POINT CLOUD
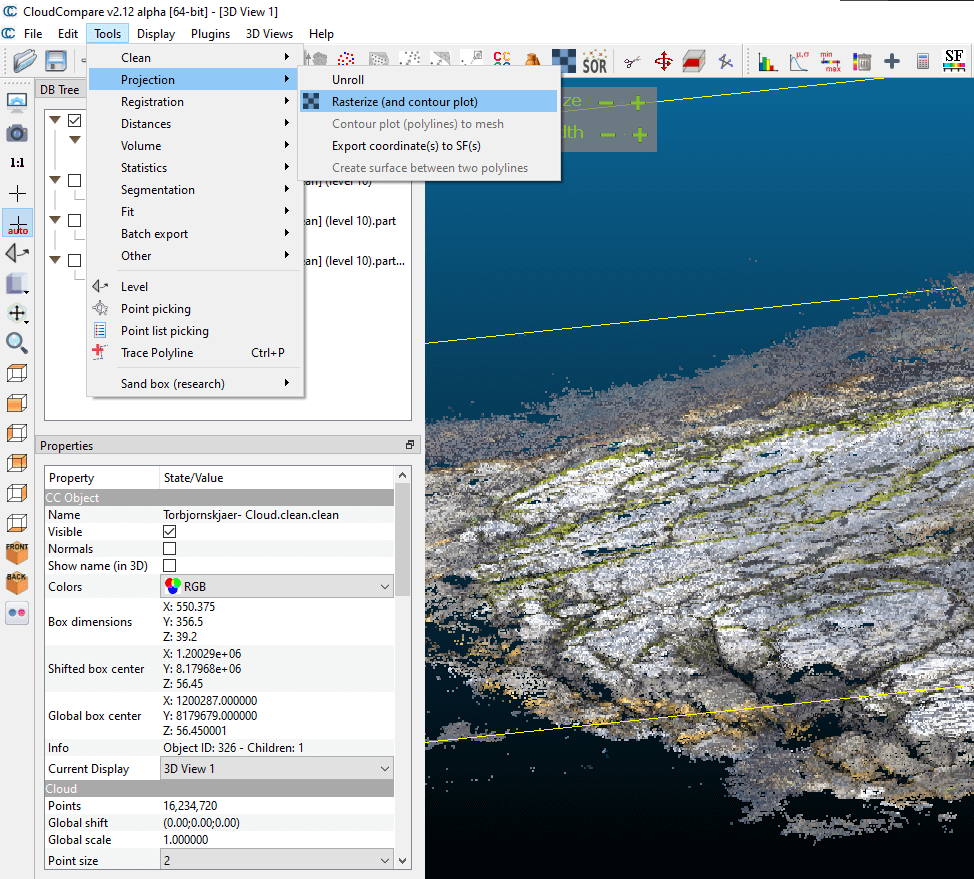
Last but not least, we present another useful CloudCompare function. With this, you can create raster files along the different axes and values of the point cloud. The procedure is extremely simple! Select the point cloud, then select the “Tools/Projection/Rasterize” function. This menu item is available in the top menu bar of CloudCompare.
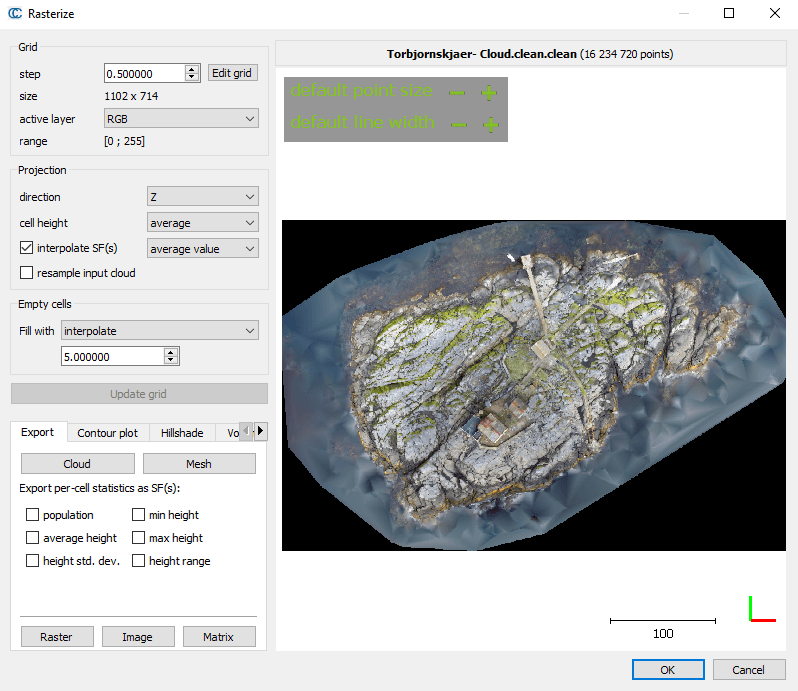
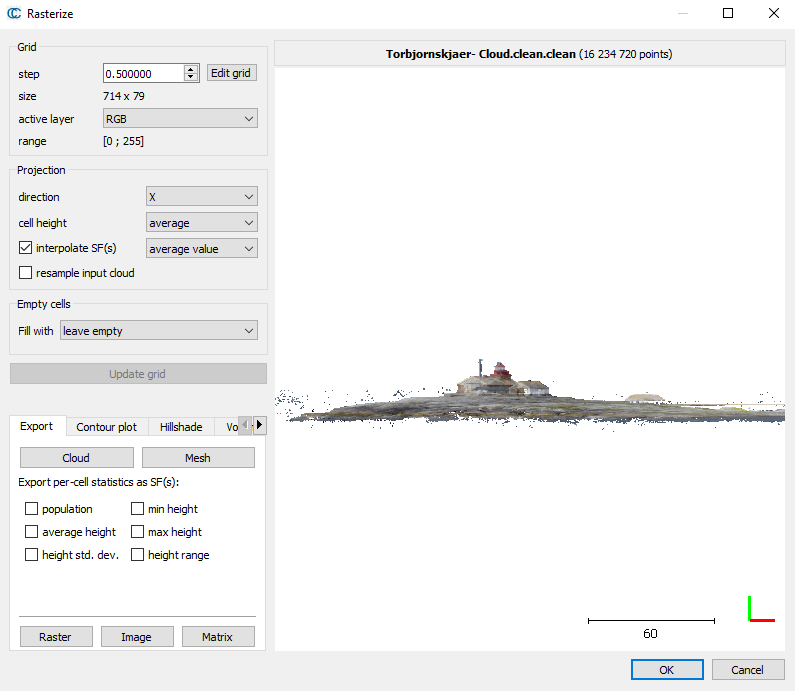
First, set the “step” parameter, which essentially determines the resolution. Then you have so many options in CloudCompare’s Rasterize function! If the point cloud is RGB colored, you can take advantage of this to create a quasi-orthophoto map, since you can create a real color raster file. To do this, set the list item next to “active layer” to “RGB”, then press the “Update grid” button.
By changing the “direction” value under the “Projection” section, you can display the result along different axes in CloudCompare. So, for example, you can even create a side view image from the point cloud.
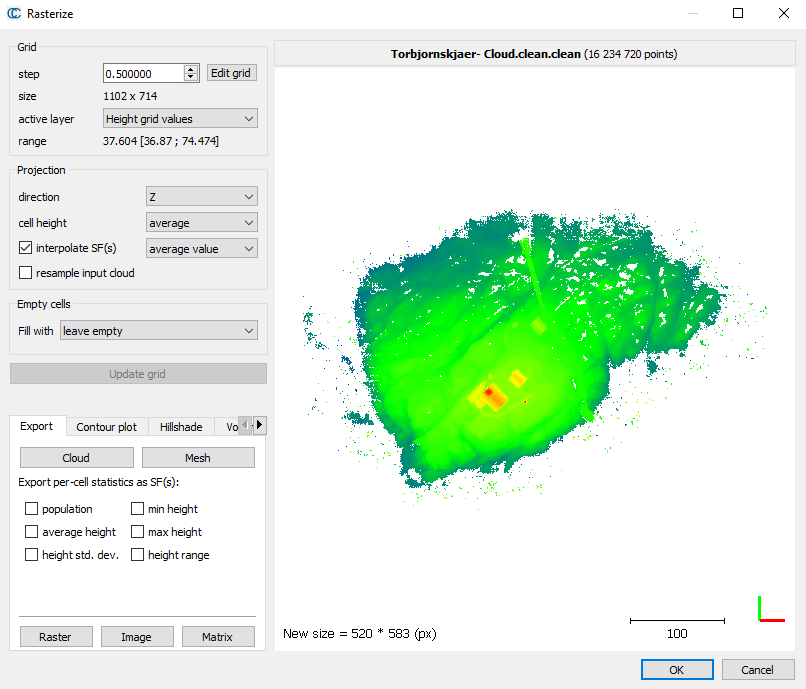
If you want to create a height model, change the “active layer” value to “Height grid values”.
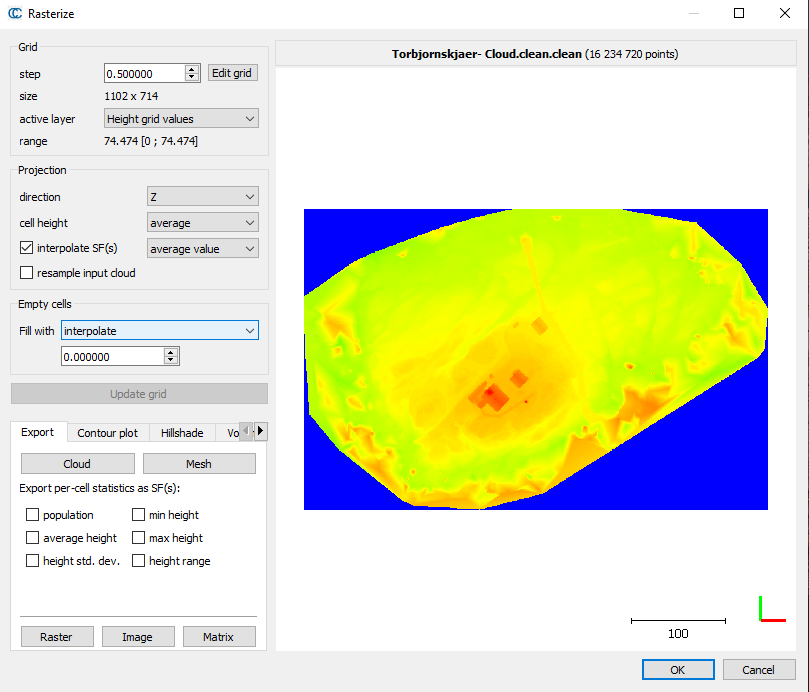
CloudCompare also gives you the opportunity to fill in the missing parts with approximate calculations (interpolation). To do this, you only need to set the “Fill with” drop-down menu to “interpolate” in the “Empty cells” section.
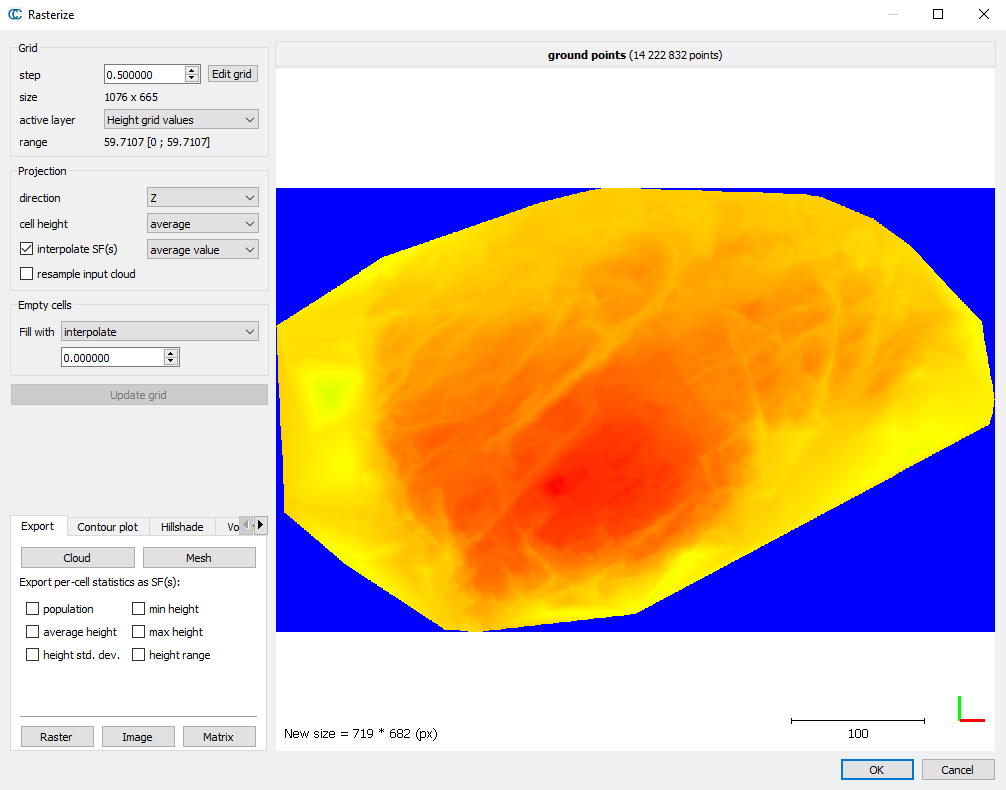
You can convert the terrain model extracted from the point cloud presented in the previous chapter “CloudCompare: Point cloud sorting – automated ground level and building filtering using the CSF plugin”
FINAL THOUGHTS
The results of CloudCompare analyses can be large point clouds, 3D models and high-resolution raster files. If you want to share these with your business partners (customers, colleagues, main or subcontractors) in the most professional and yet simplest way possible, then remember: this is why we are developing the SurveyTransfer data sharing tool! Here you can follow where we are 🙂
If you really liked what you read, you can share it with your friends. 🙂
Did you like what you read? Do you want to read similar ones?